Quick Tip: Changing DNS providers

Have you ever noticed that some websites that you come across on the Internet seem inaccessible to you but not to everyone else? Have you received a 404 error accessing a site on the Internet but know that it's accessible to other people? Well, turns out it may not be you, but more rather your DNS provider.
Switching DNS providers can offer several benefits depending on your needs and preferences. Here are some common reasons why people might choose to make a switch:
- Speed and Performance: Some DNS providers are faster than others at resolving domain names. A faster DNS provider can reduce the time it takes to load websites.
- Security: Certain DNS providers offer enhanced security features, such as protection against phishing attacks, malware, and other online threats. They might also provide DNSSEC (Domain Name System Security Extensions) to help ensure that the DNS responses are authentic.
- Privacy: Different DNS providers have varying policies on data logging and privacy. Switching to a provider with a strong privacy policy can help protect your browsing habits from being tracked or sold.
- Content Filtering: Some DNS providers offer content filtering options, which can block access to certain types of content or websites, such as those related to adult content, gambling, or social media.
- Reliability: Not all DNS services are equally reliable. A more robust DNS provider might offer better uptime and stability, reducing the risk of interruptions.
- Custom Features: Some DNS providers offer additional features, such as customizable filtering, analytics on DNS queries, or access to a global network of servers to improve performance.
- Regional Access: In some cases, switching DNS servers can help access region-specific content or bypass certain regional restrictions.
If you’re considering switching, you might want to try out different DNS providers to see which one works best for your specific needs. Popular options include Google Public DNS, Cloudflare DNS, OpenDNS, and Quad9, each with its own set of features and benefits.
Changing DNS settings on Windows 11 is relatively straightforward. Here’s a step-by-step guide to help you through the process:
Changing DNS Settings in Windows 11
This will allow you to change the settings for only the device you are making the changes on. This will not affect the DNS settings of any other devices on your network.
Open Settings:
- Press
Win + Ito open the Settings app, or click the Start menu and select Settings.
Go to Network & Internet:
- In the Settings window, select Network & internet from the left-hand menu.
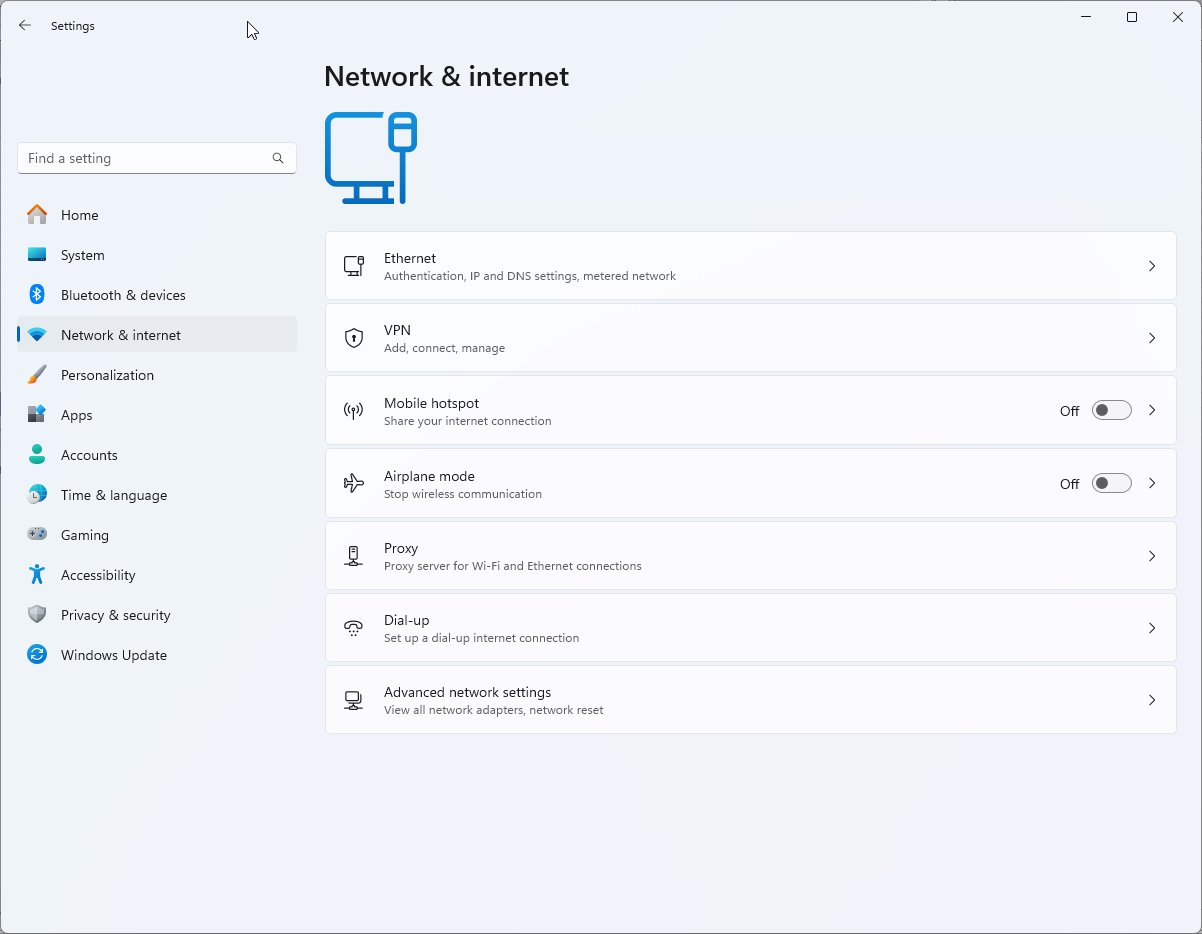
Select Your Network Connection:
- Depending on whether you're using a wired (Ethernet) or wireless (Wi-Fi) connection, click on either Wi-Fi or Ethernet.
Access IP Settings:
- For Wi-Fi, click on the network you're connected to and then select Properties.
- For Ethernet, just select Properties directly.
Edit DNS Settings:
- Scroll down to the DNS server assignment section. Click the Edit button.

Choose DNS Settings Type:
- In the dialog that appears, you’ll see options for Automatic (DHCP) or Manual. Select Manual.
Enable IPv4 or IPv6:
- Toggle the switch to enable either IPv4 or IPv6 (or both if needed).
Enter DNS Addresses:
- For IPv4, enter the Preferred DNS and Alternate DNS addresses provided by your new DNS provider.
- For IPv6, do the same for the Preferred DNS and Alternate DNS addresses if you're using IPv6.
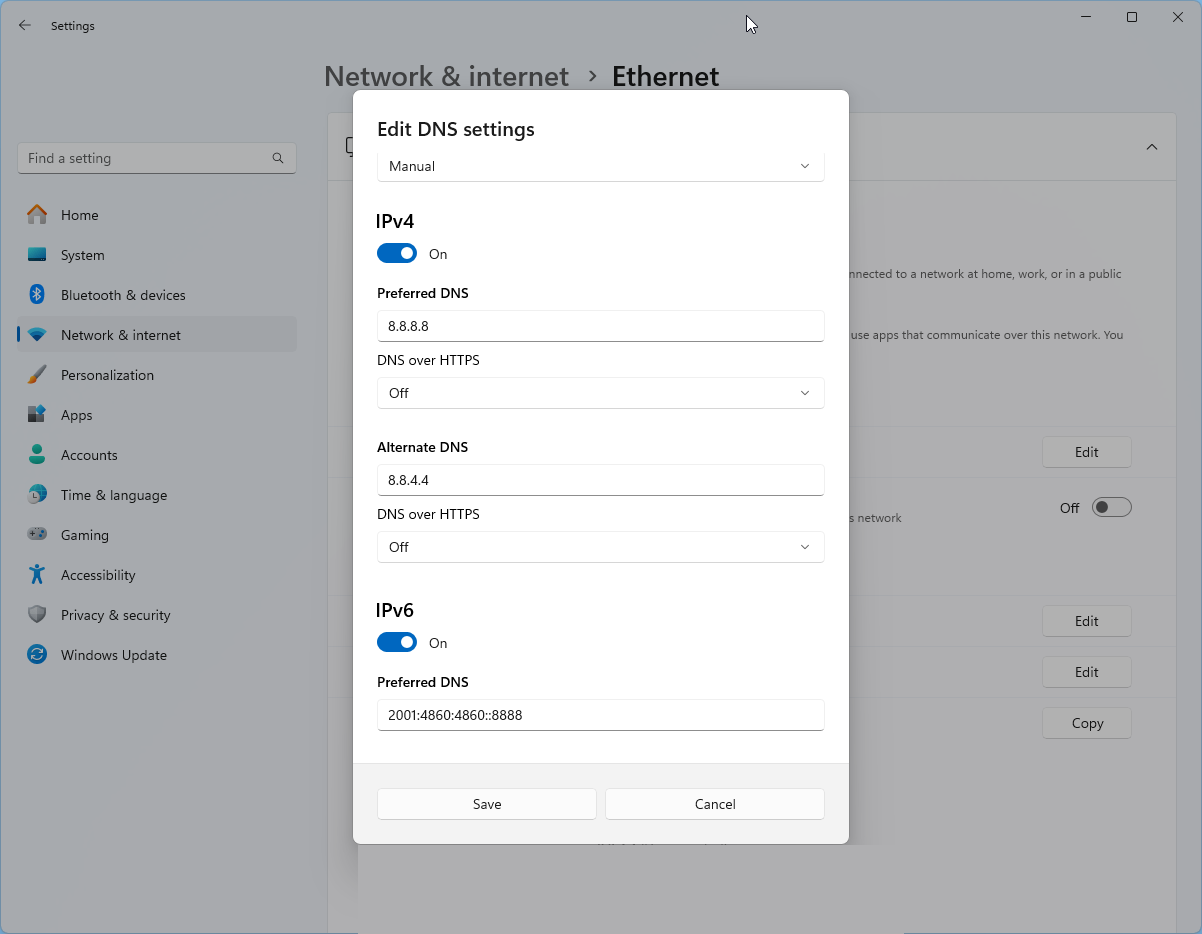
Save Changes:
- Click the Save button to apply your new DNS settings.
Restart Your Connection (optional):
- Sometimes, you may need to restart your computer or disconnect and reconnect your network connection for the changes to take effect.
Changing DNS Settings on MikroTik router
This will allow you to change the DNS settings for any devices that connect to your router that use Automatic DHCP assignment. This change will usually affect all devices that connect to the router.
Open IP -> DNS from the Mikrotik main menu
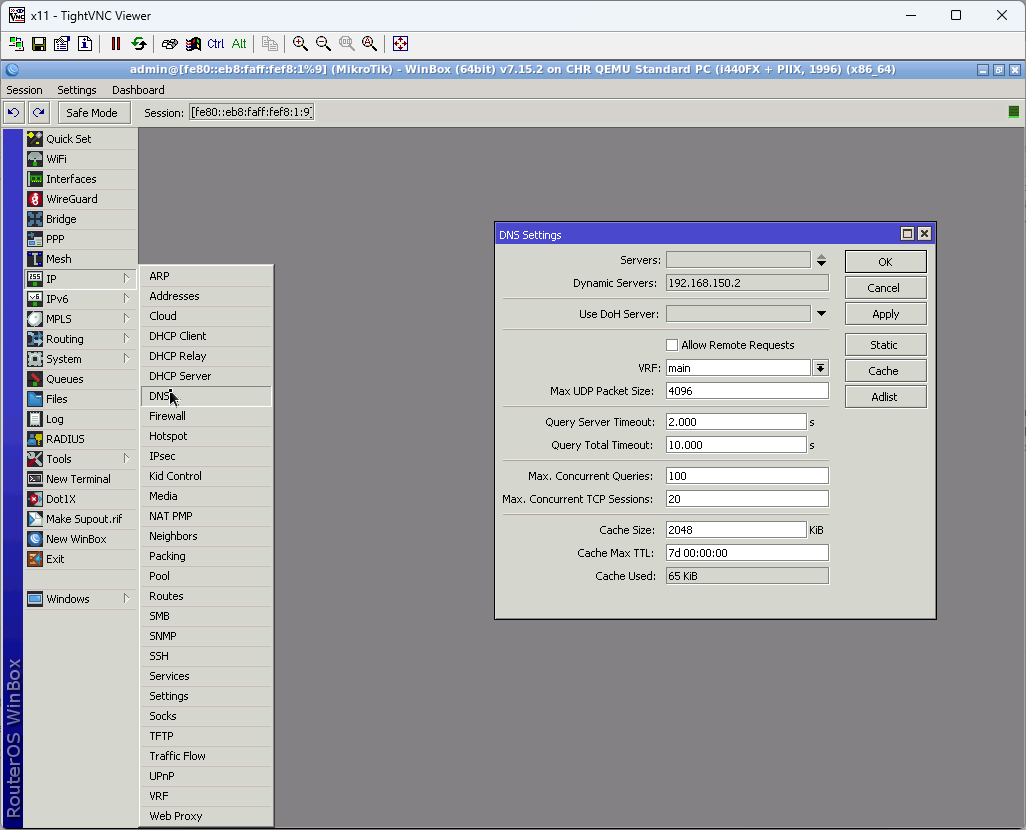
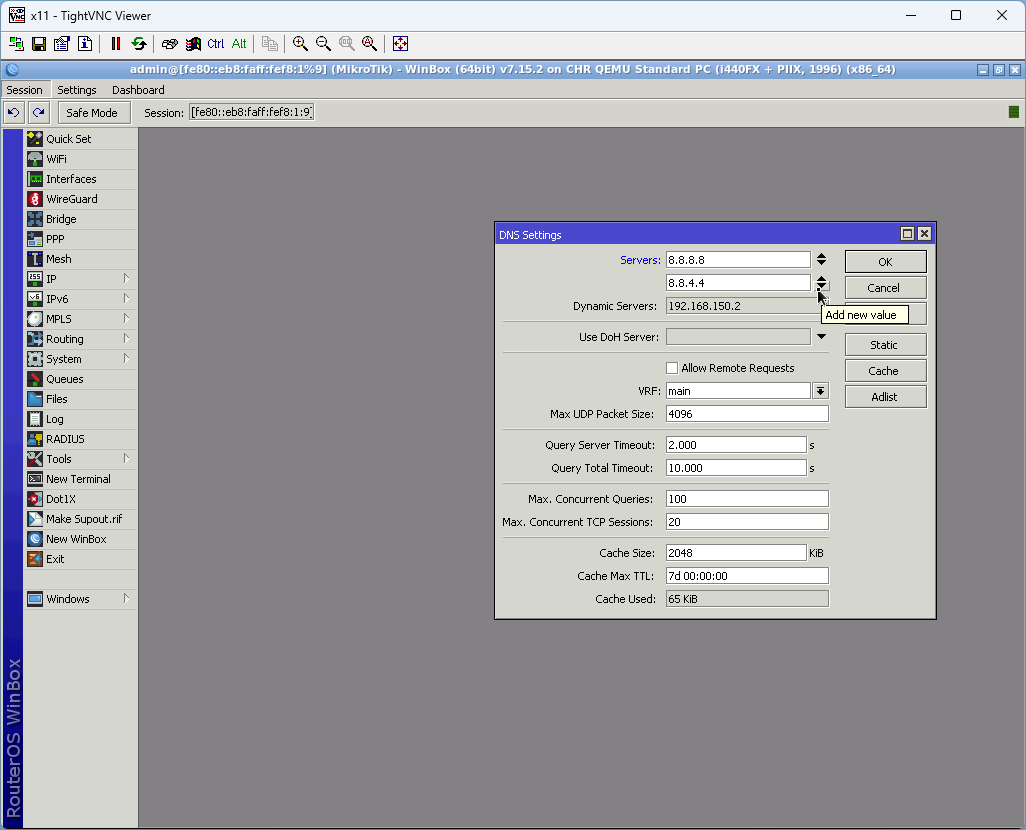
In the Servers textbox, enter the value for the DNS server you wish to use. If you wish to add more than one DNS server, hit the down arrow next to the entry to add another textbox. When you have added your servers, hit Apply to save.
DNS Addresses for common Public DNS Servers
Google Public DNS:
- IPv4:
- Preferred DNS:
8.8.8.8 - Alternate DNS:
8.8.4.4 - IPv6:
- Preferred DNS:
2001:4860:4860::8888 - Alternate DNS:
2001:4860:4860::8844
Cloudflare DNS:
- IPv4:
- Preferred DNS:
1.1.1.1 - Alternate DNS:
1.0.0.1 - IPv6:
- Preferred DNS:
2606:4700:4700::1111 - Alternate DNS:
2606:4700:4700::1001
OpenDNS:
- IPv4:
- Preferred DNS:
208.67.222.222 - Alternate DNS:
208.67.220.220 - IPv6:
- Preferred DNS:
2620:119:35::35 - Alternate DNS:
2620:119:53::53
Changing your DNS settings can help with performance, security, and privacy. Just make sure to choose a reliable DNS provider that fits your needs.