Mikrotik Router Branding

One of our readers recently asked: "How can I change the MikroTik name on the background welcome screen?" We thought this was a great opportunity to provide an answer, as it not only allows for a layer of personalization on your router but also adds a professional touch if you're in the business of distributing routers to customers.
First off, we definitely recommend reviewing the MikroTik Router OS branding page here: https://help.mikrotik.com/docs/display/ROS/Branding and reviewing the video "MikroTik branding packages" but if you want to skip down and take a look at what we did, it only took us a couple minutes at most to create a basic branding for our router.
Mikrotik RouterOS branding
Step 1: You'll need to have an account on https://www.mikrotik.com/client. If you don't, hop over there and create an account.
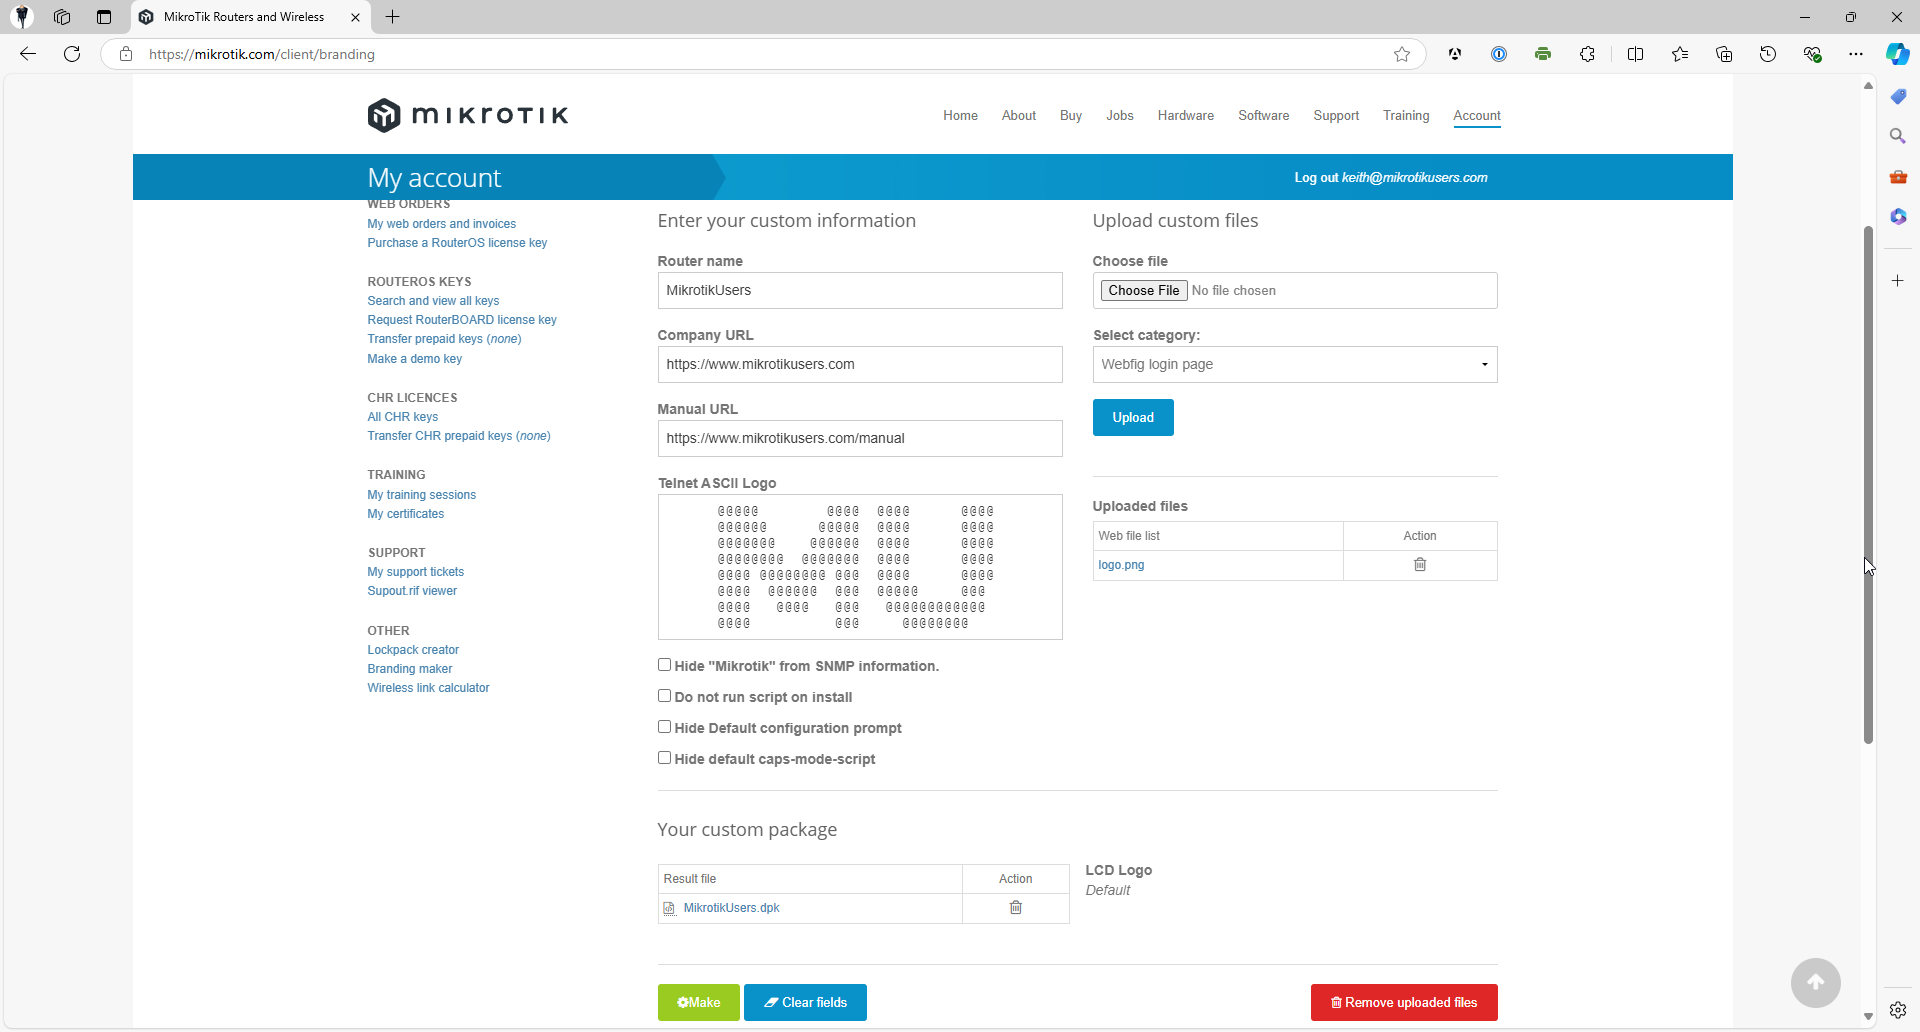
Step 2: Hop on over to https://mikrotik.com/client/branding. This is the branding package maker site. You'll enter in and upload your custom information and the site will create a customization package for you that you'll then take and upload onto your router.

As you see from the image, we entered a default Router name, our company URL, and a URL to our documentation. We also supplied a Telnet ASCII logo, that we created using by uploading our logo to the Image to ASCII art archive https://www.asciiart.eu/image-to-ascii. (Please note, as discussed in the video and the documentation, the logo cannot be more than 8 lines, so you will possibly need to lower the # of characters to get it under 8 lines tall.). We also uploaded a WebFig image, and as also discussed in the video, our filename must be mikrotik_logo.png.
Step 3: Click the Make button. Assuming we did everything correctly, the web page generated a package for us. Download that package onto your computer.
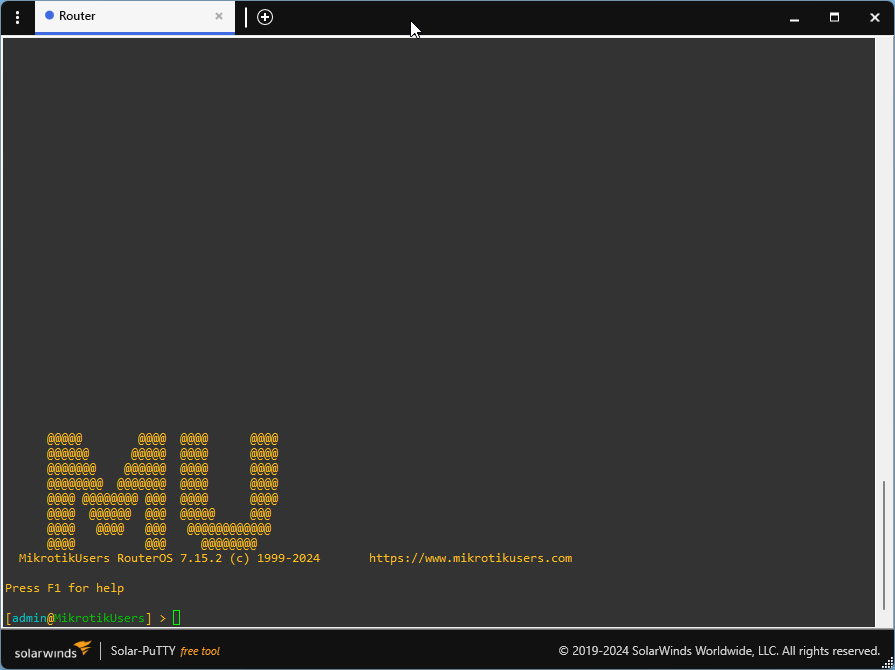
When we hit make, it generated a MikrotikUsers.dpk package for us, which we downloaded onto our computer. There are multiple ways to then install this package on our router. We can use the WinBox console and drag the file from our computer into the Files window, or use the WebFig to upload the file from our web browser, or we can scp or ftp the file from our local machine onto the router.
Step 4: Once the file has been uploaded onto the router, reboot your router. You should now have a customized router like the one shown below.
In this example, we’ve only covered the basic customization options. However, there's so much more you can do to personalize the look and feel of your MikroTik router. For a comprehensive guide on all the available customization options, be sure to visit the branding documentation page. https://mikrotik.com/client/branding