Lab 1.2 Installing MikroTik RouterOS on GNS3
Welcome to the second part of this lab tutorial. In this exercise, we are going to be installing the MikroTik RouterOS image into our previously installed GNS3 environment. As previously mentioned, the goal of this lab is to allow us to stand-up a working MikroTik RouterOS virtual device as opposed to having a physical device present and allow us to simulate network conditions against the device. Before we begin, if you have not previously installed the GNS3 software onto your workstation, we advise that you go back and follow the instructions here to get the GNS3 software up and running on your machine. If you have installed the software, please follow the tutorial below and at the end of the tutorial you should have a working RouterOS virtual image. Let's begin.
Step 1: We need to download the latest version of the RouterOS image. To do so, navigate to the Cloud Hosted Router section and download the latest raw disk image. https://download.mikrotik.com/routeros/7.12.1/chr-7.12.1.img.zip
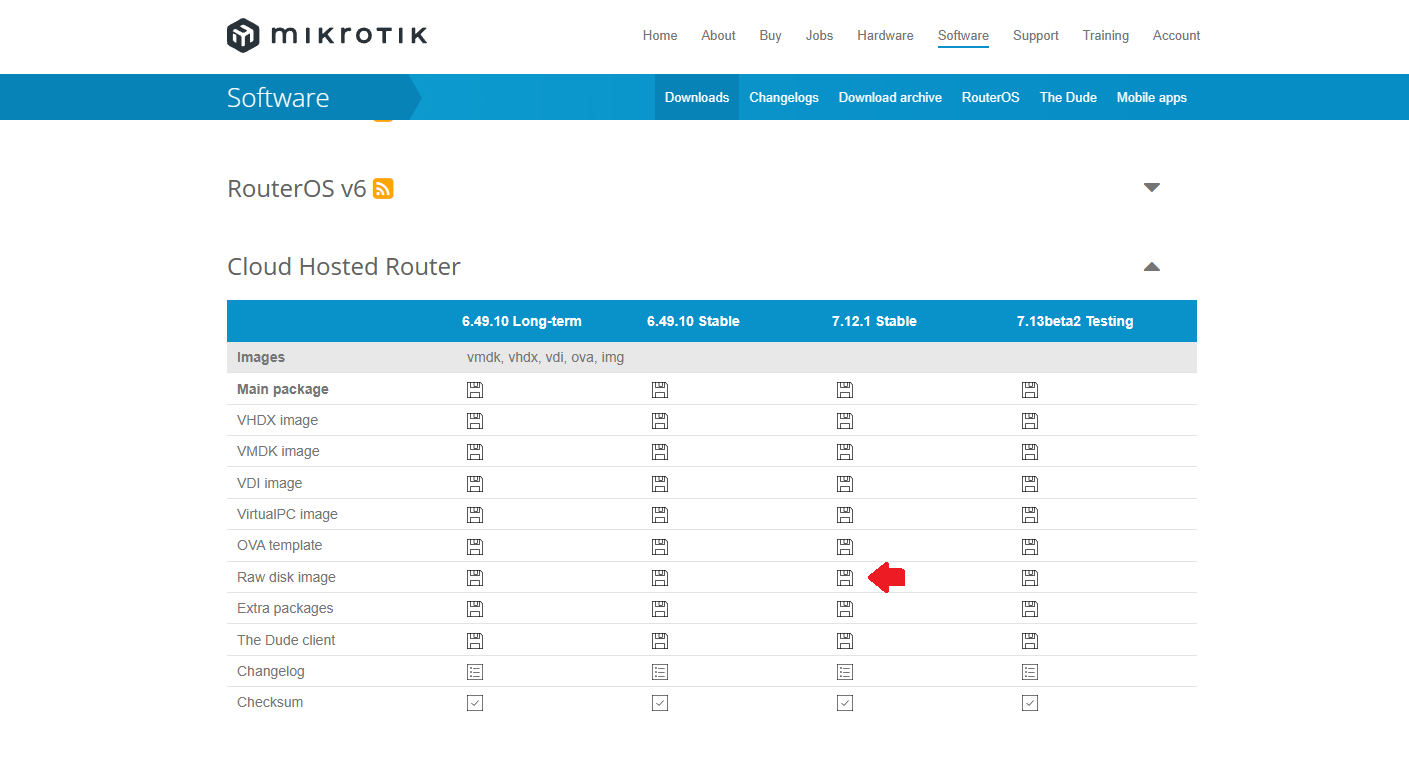
Step 2: Unzip the files into a directory. You should end up with a single file, which is the virtual machine image shown here. (Please note: At the time this was written, 7.12.1 Stable was the latest release of the software. It is okay to download a slightly higher revision of the software, say 7.12.2, etc.) if that is the latest released version of the software.

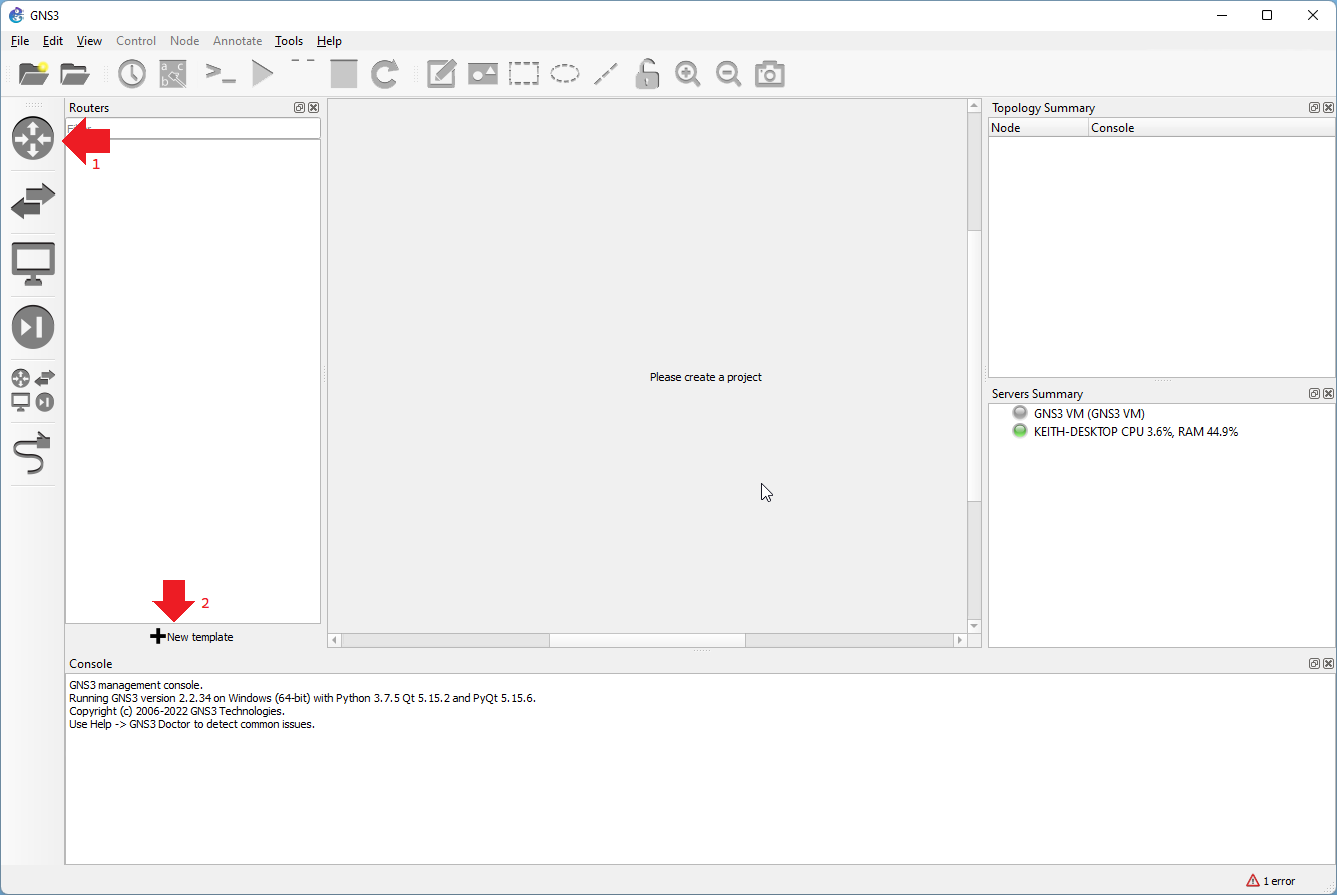
Step 3: If you have made it thus far without any issue, it is now time to perform the final step, which is to install the Mikrotik CHR appliance. To do that, we are going to install a new router template in GNS3. With GNS3 open, click the Routers tab in GNS3, and then click New Template as shown in the photo below.
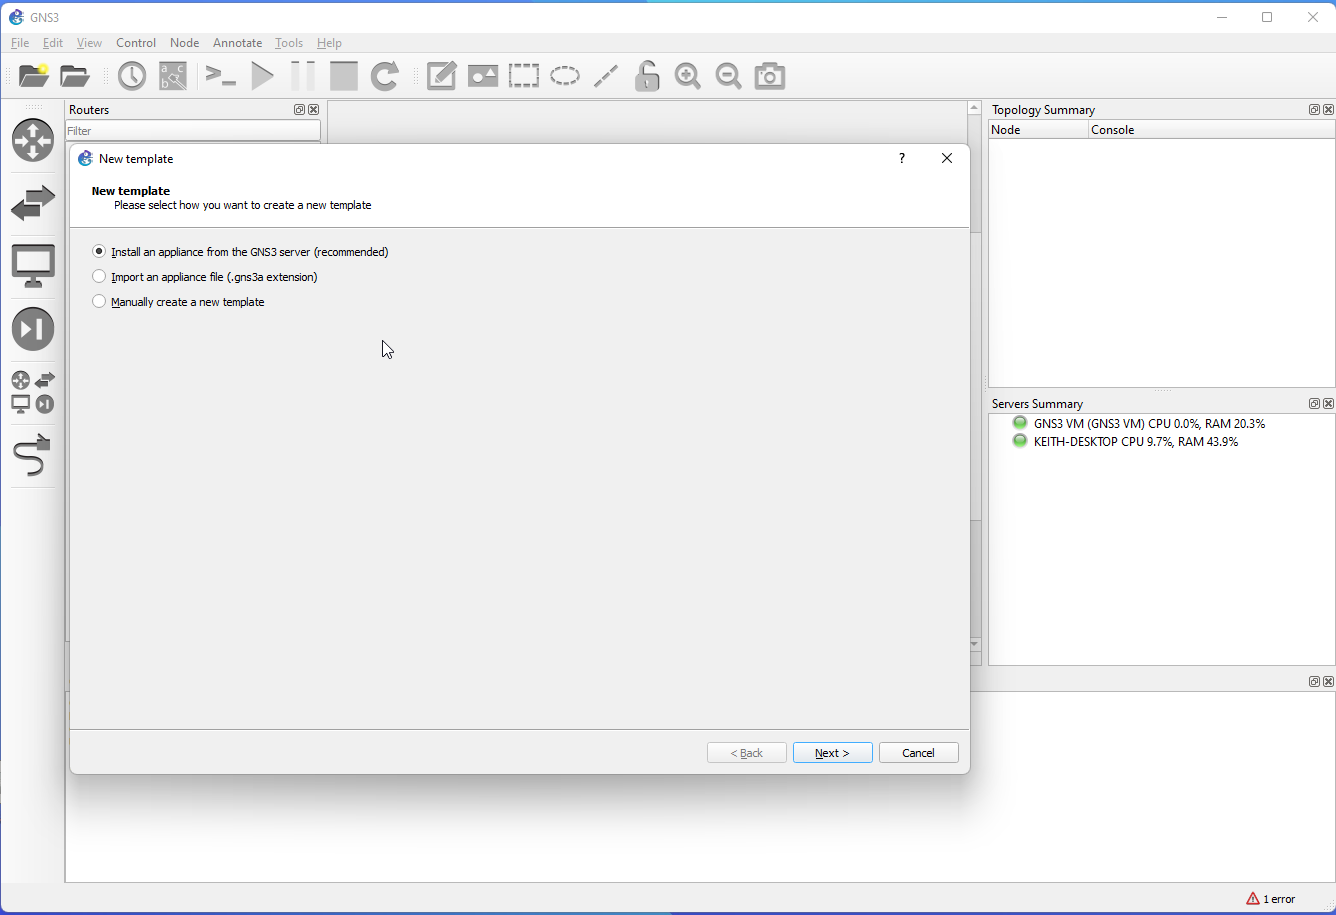
Step 10: Select Install an appliance from the GNS3 server (recommended) and hit Next to continue.
Step 11: Expand the Routers tab.
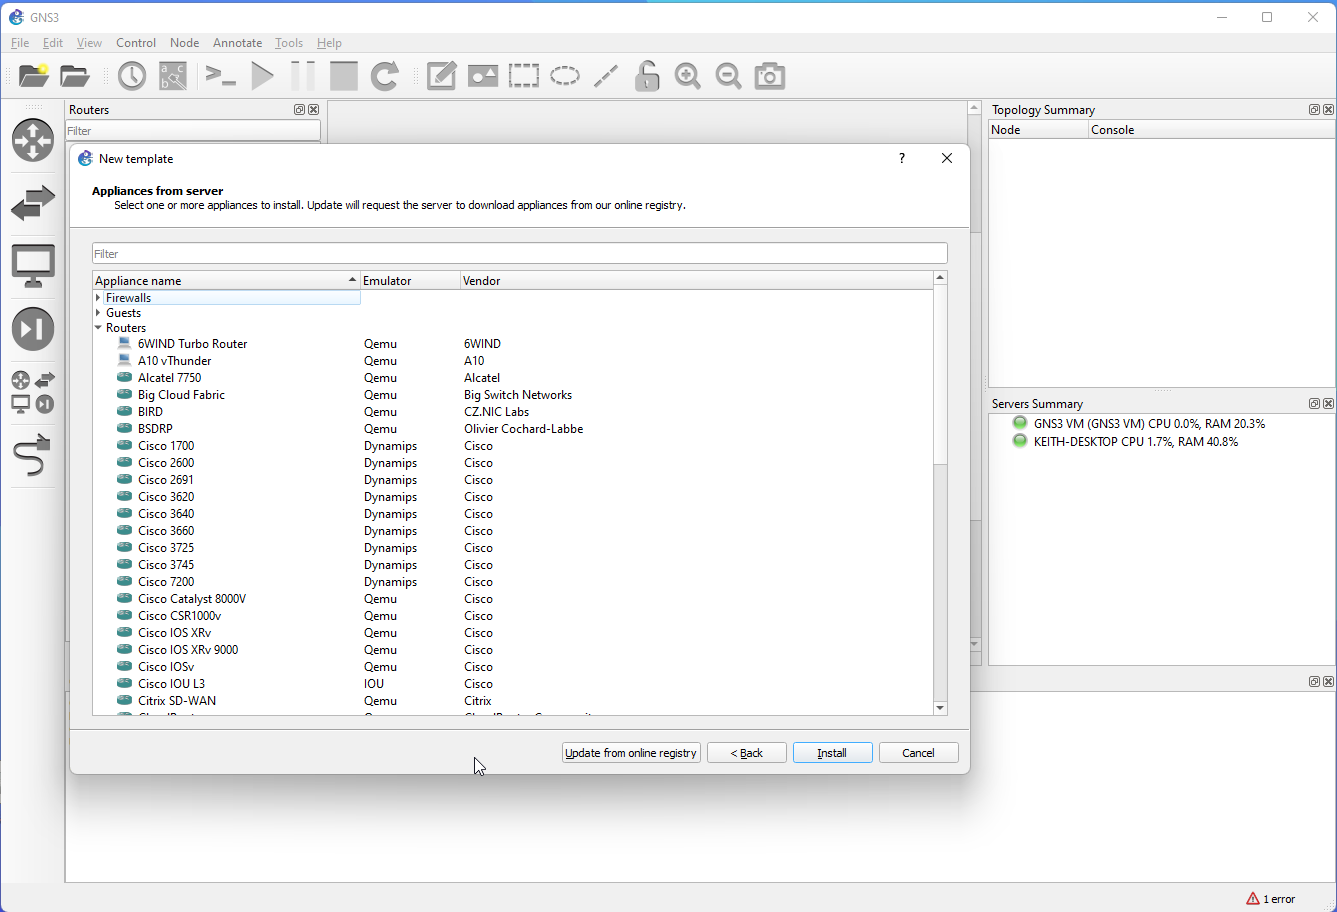
Step 12: Select Mikrotik CHR (Qemu) Mikrotik and hit the Install button to continue.
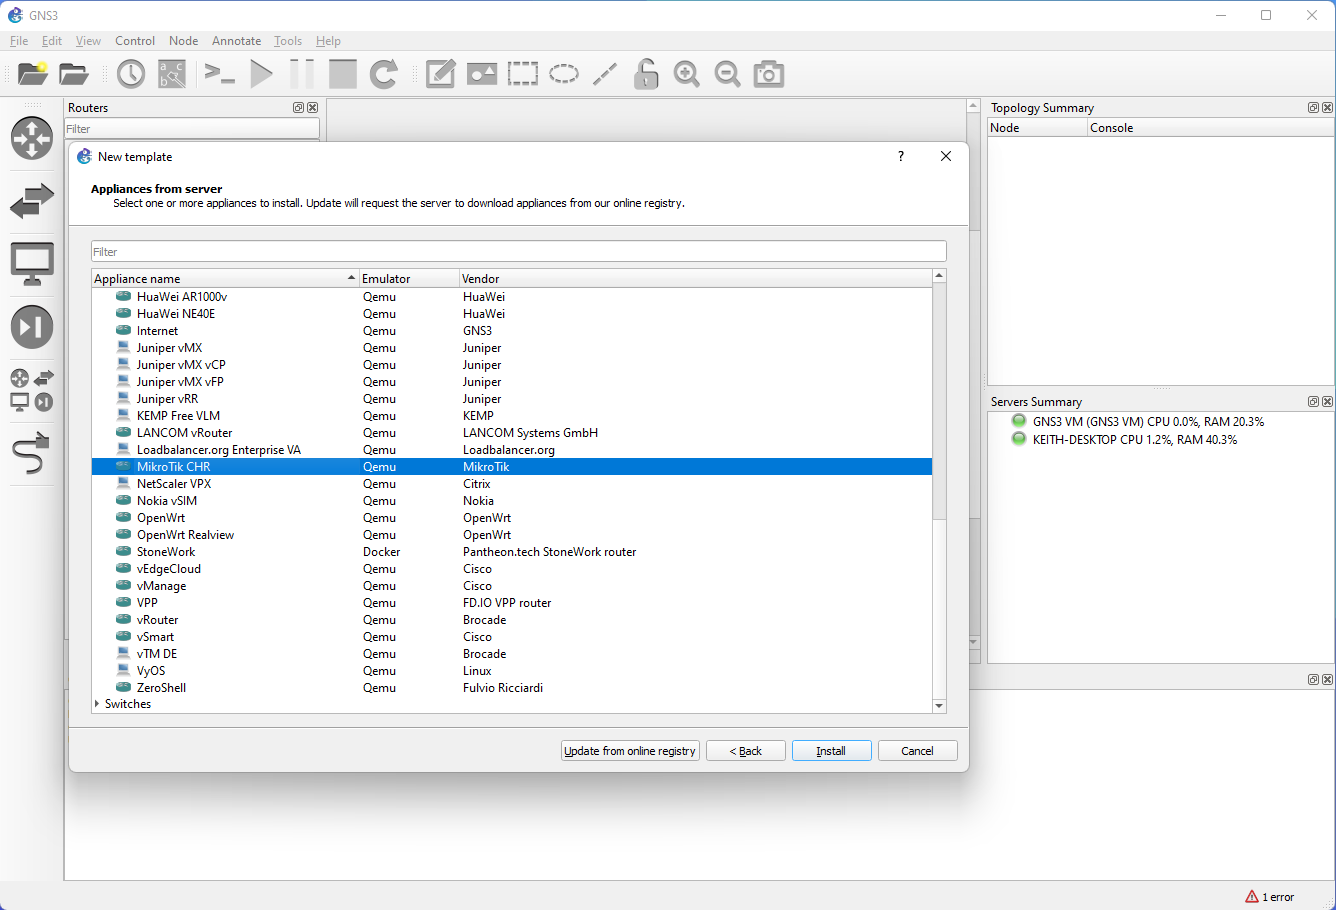
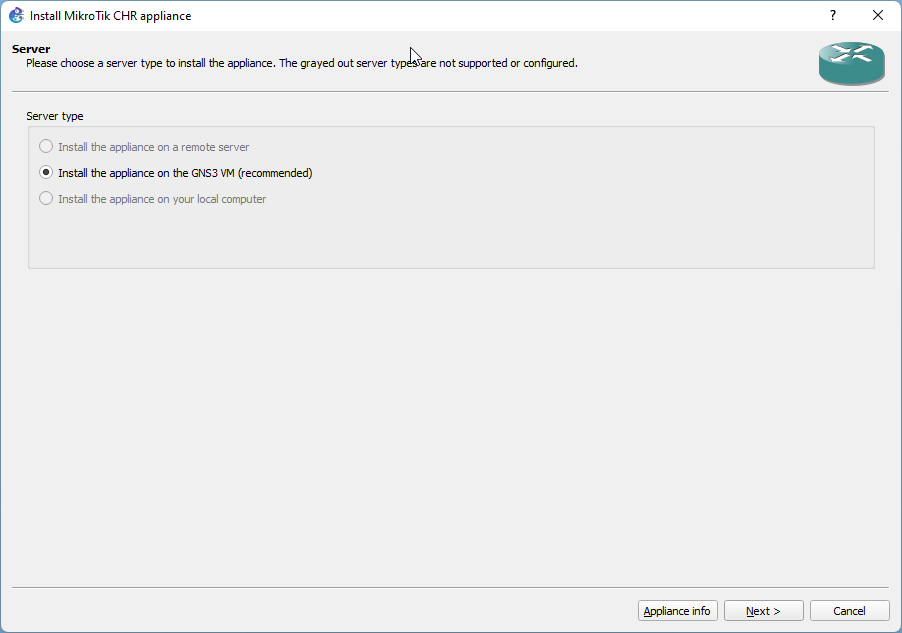
Step 13: You will be prompted to choose a location to install the appliance. Select Install the appliance on the GNS3 VM (recommended) and hit Next to continue.
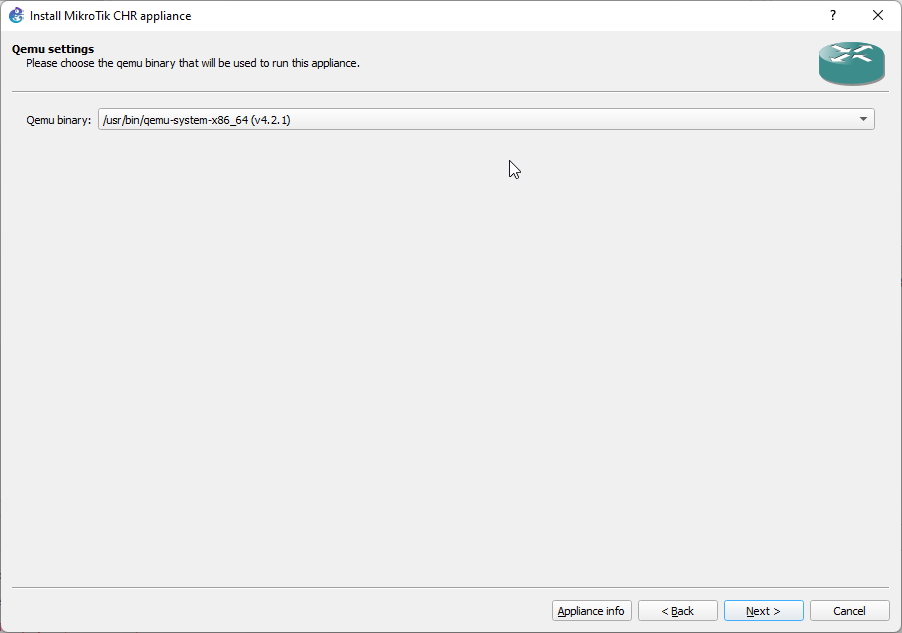
Step 14: Select the Qemu binary (emulator) that will be used to run the appliance (just leave as default and press Next to continue)
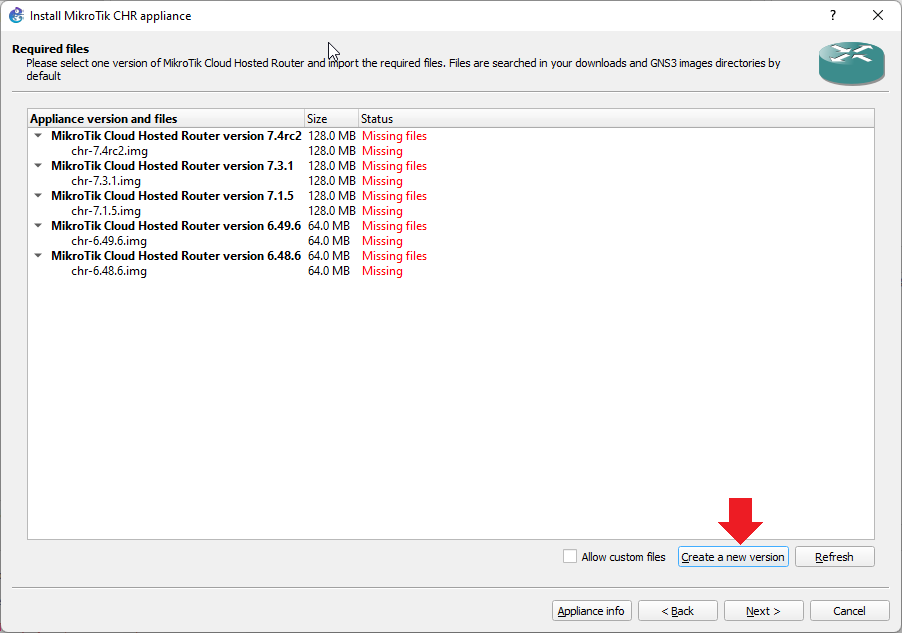
Step 15: On this prompt to select a CHR image, we are going to upload the CHR image we downloaded earlier, rather than use the ones present. This will ensure we have the latest version of the CHR appliance. To do so, hit the Create a new version button as shown.
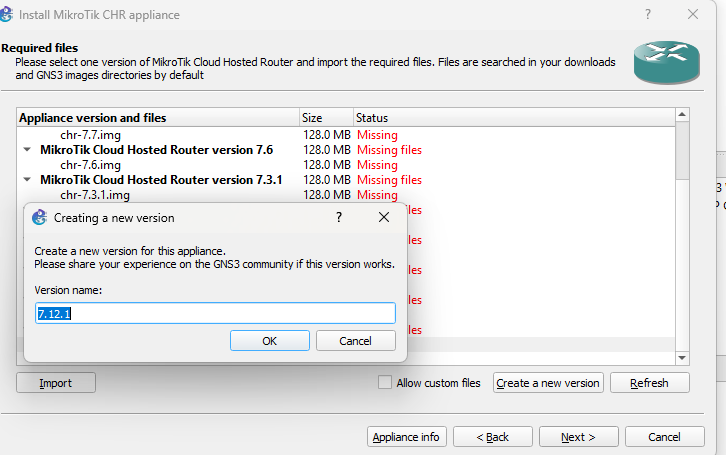
Step 16: Provide a name for the new appliance. In this tutorial, we provided the version name 7.12.1 and hit Ok button.
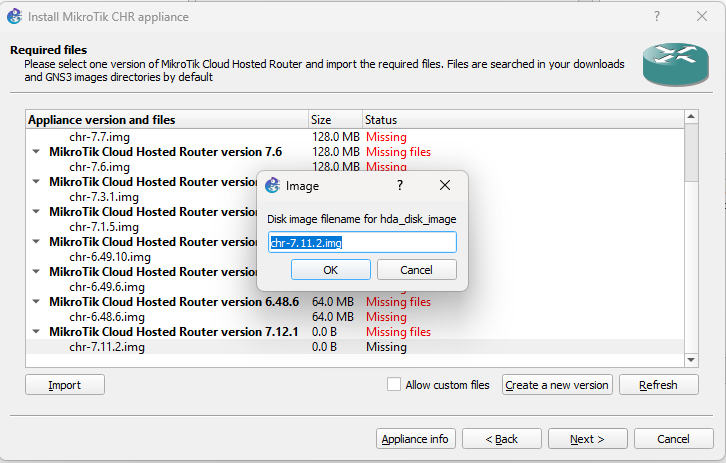
Step 17: Provide a name for the disk image. In this example, we used chr-7.5.img, to match the file we downloaded earlier. Click OK to continue.
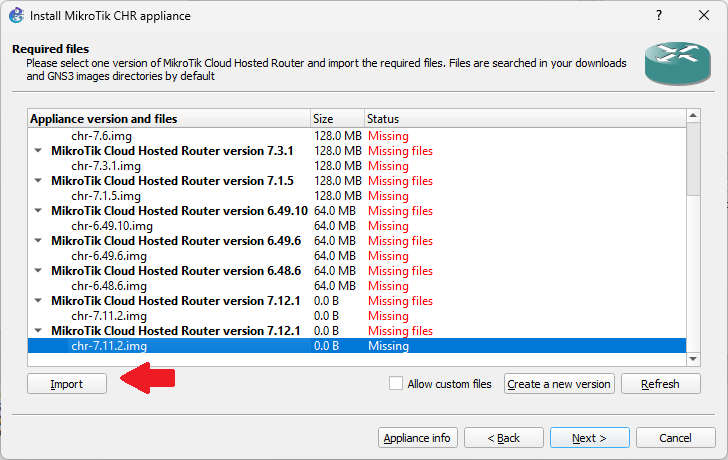
Step 18: Once you have provided a version name and file name, we need to install the actual appliance. We need to provide the image file. Expand the entry MikroTik Cloud Hosted Router version 7.12.1 and you will see an Import button. Hit the import button and navigate to the chr-7.12.1.img file we downloaded earlier and select it. Once you do that, the Status should change from Missing to Read to install.
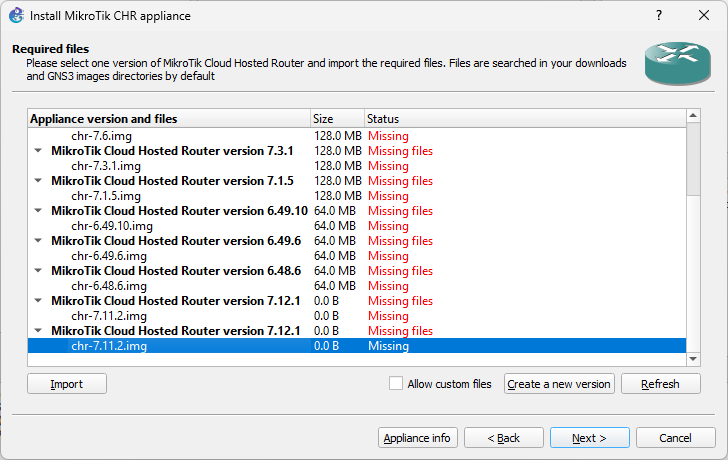
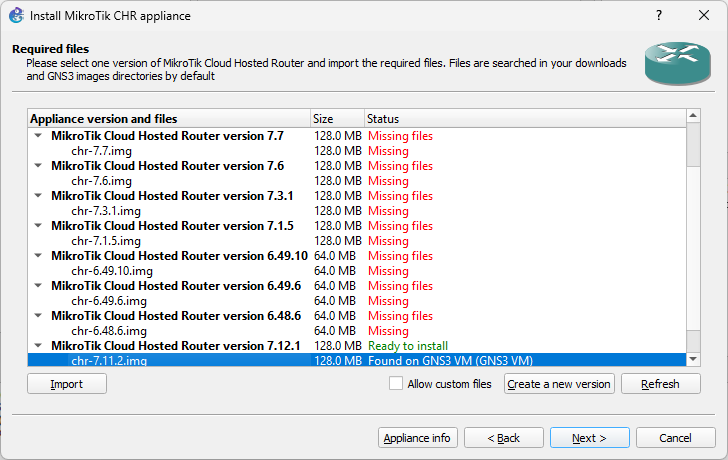
Step 19: You will receive a prompt asking you if you would like to install the Mikrotik CHR version 7.12.1. Go ahead and answer Yes.

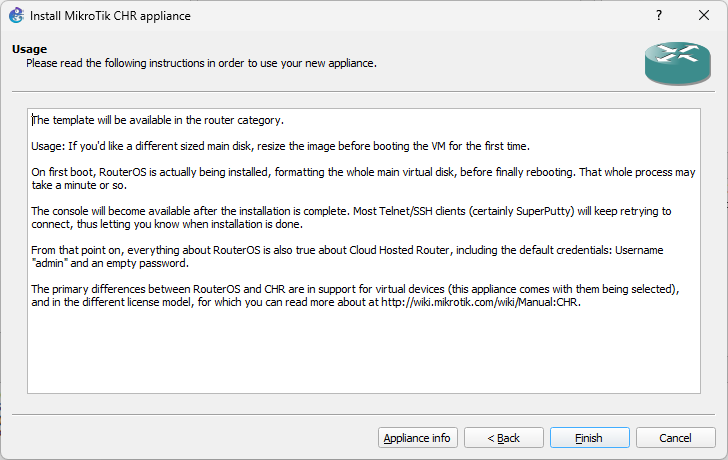
Step 20: Hit Finish to install the appliance. Once installed, the appliance will show up as a template in the Routers section.

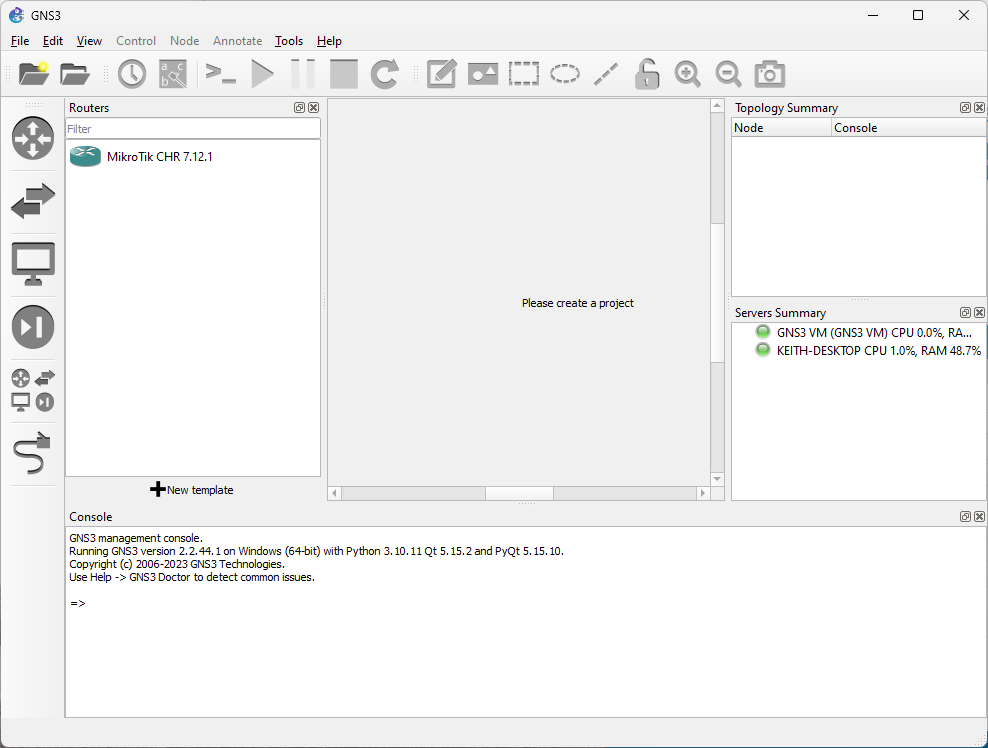
At this point, the Mikrotik Cloud Hosted Router 7.12.1 should be installed and show up as an appliance in your Routers section. If you have made it this far, congratulations! You now have a MikroTik virtual CHR installed in GNS3!
So now, after all is said and done, what was the purpose and benefit of getting this setup? Well, we can now simulate a network environment and stand up and destroy MikroTik routers in a virtualized environment without affecting any of our existing infrastructure! This virtual environment makes a great environment to test and play with the CHR before performing a live deployment, as well as a great study resource for future exams. This, combined with the actual hardware, should provide a great resource environment for learning and exploration.
