Installing Mikrotik CHR in EVE-NG (Part 3)
In part 3 of the series, we show you how to install the Mikrotik CHR in the EVE-NG environment. If you haven't already, check out Part 1 and Part 2 here. By this point, you should have EVE-NG successfully installed inside VMware Workstation.
Requirements
Before beginning, make sure you have the following:
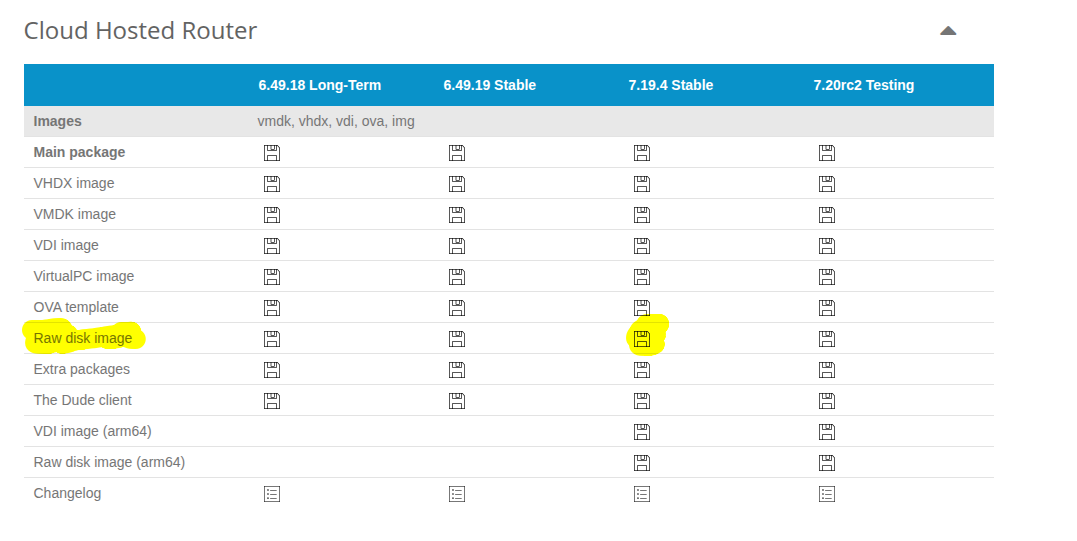
- Download the latest stable Mikrotik CHR image here. https://mikrotik.com/download.
At the time this was written the latest stable version is 7.19.4. Make sure to download the Raw disk image format.
- Download an SSH client to allow you to upload the image file into the virtual environment. I recommend FileZilla, as it has a Windows, Mac, and Linux client.
Promiscuous mode is a special setting for a network interface card (NIC) that allows it to capture all packets on the network segment, not just the ones addressed to its own MAC address. Normally, a NIC discards any traffic not destined for it. With promiscuous mode enabled, the NIC forwards all packets to the operating system, which makes it useful for monitoring and analyzing network activity. For VMware Workstation, it is important that promiscuous mode is enabled, as if not it will prevent your EVE-NG appliances from being able to communicate with the network.
1. Start the Virtual Machine
Open VMware Workstation, find your EVE-NG virtual machine, and start it if it is not already started.
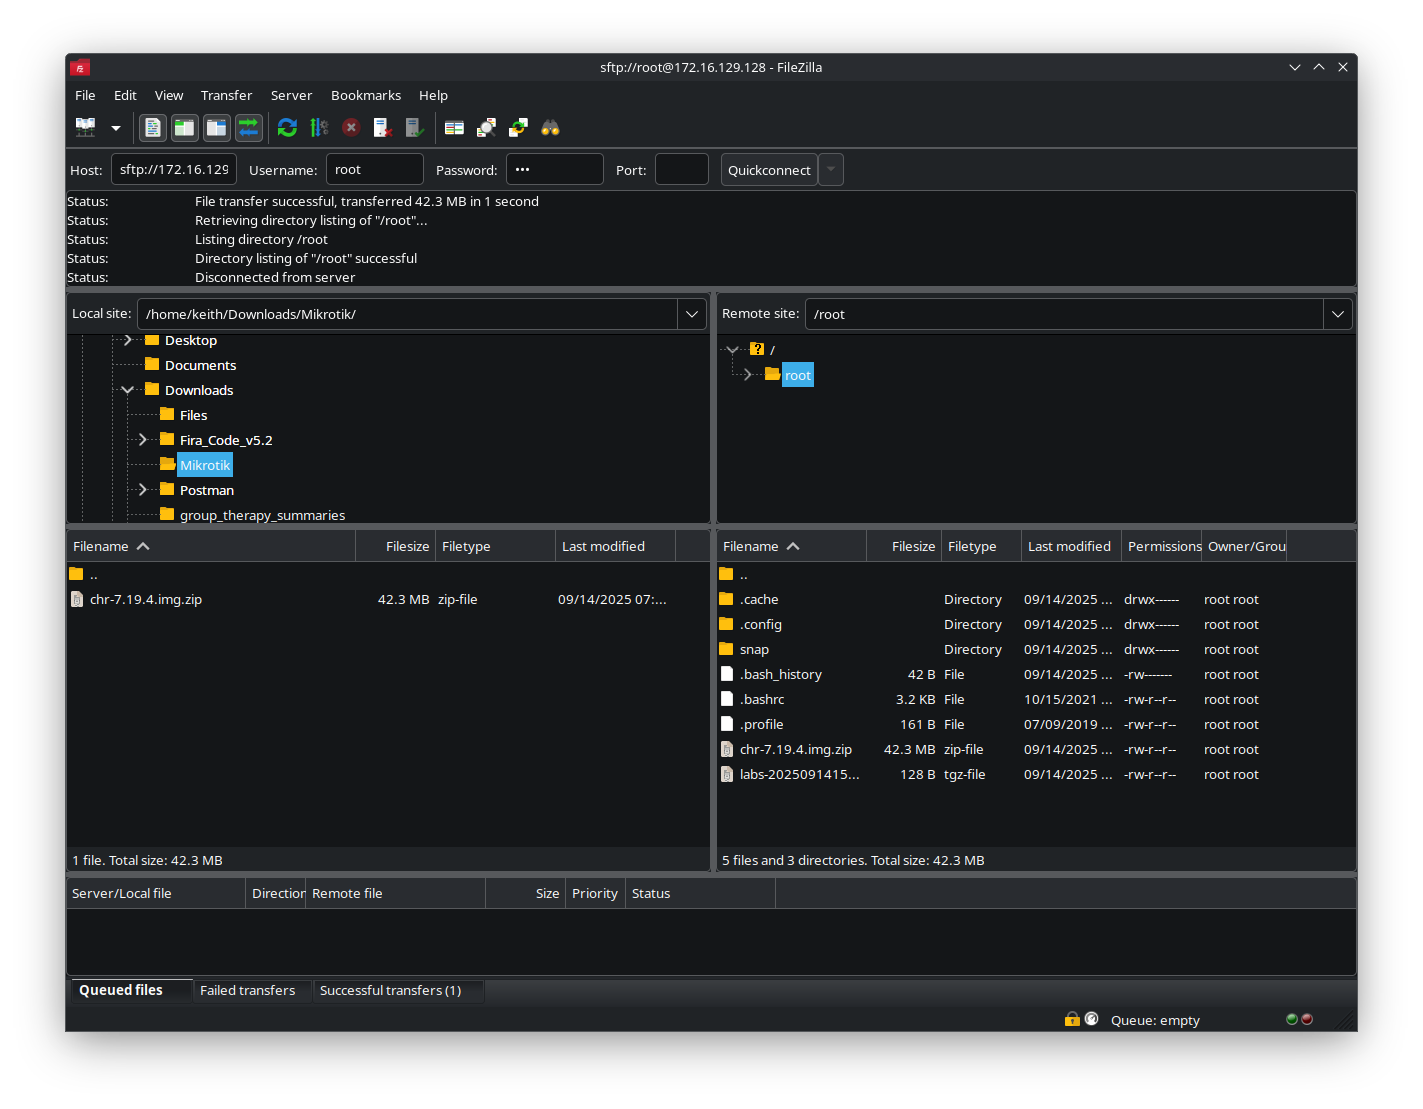
2. SFTP into the Virtual Machine
Using Filezilla, SFTP into your EVE-NG virtual machine, and then copy the MikroTik CHR image that you downloaded into the home directory on your virtual machine.
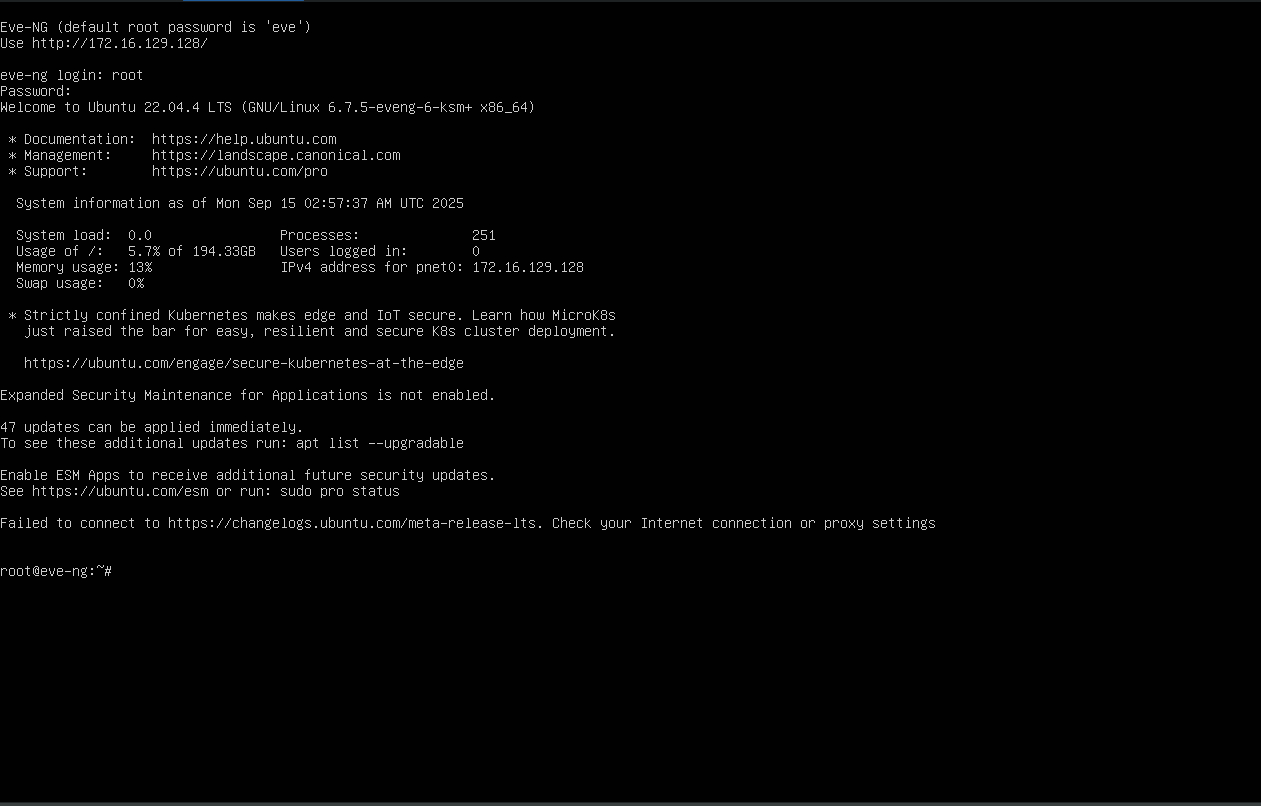
3. Log into your Virtual Machine
At the eve-ng login, enter your username and the password that you set when you created the VM.
3. Create a directory for your virtual appliance
We need to install our CHR appliance into a specific location. In order to do so, enter the following commands at the command console.
mkdir /opt/unetlab/addons/qemu/mikrotik-7.19.4/
unzip chr-7.19.4.img.zip /opt/unetlab/addons/qemu/mikrotik-7.19.4/
cd /opt/unetlab/addons/qemu/mikrotik-7.19.4/
mv chr-7.19.4.img hda.qcow2
/opt/unetlab/wrappers/unl_wrapper -a fixpermissions
This installs the virtual appliance and makes the virtual appliance available within your EVE-NG workspace. Now, let's see how to use it.
4. Log In to the Virtual Machine Management Console
Open your browser, and log into the virtual machine management console. To log into the EVE-NG web interface, open a web browser and navigate to the IP address assigned to your EVE-NG server. Use the default credentials, typically username: admin and password: eve, to log in. If this fails, try username: root and password: eve for the initial command-line interface (CLI) login.
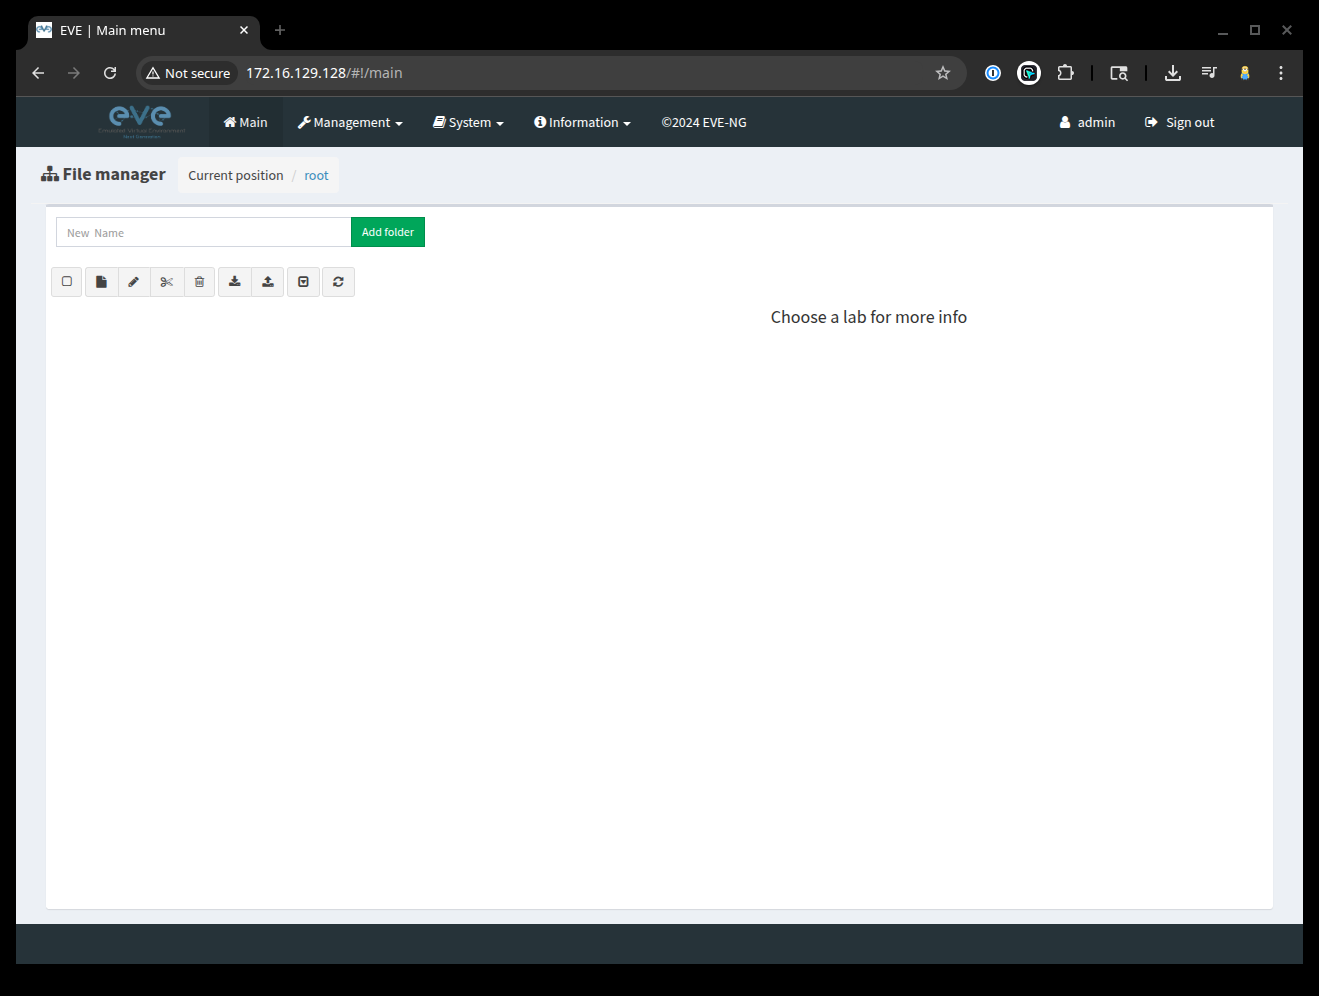
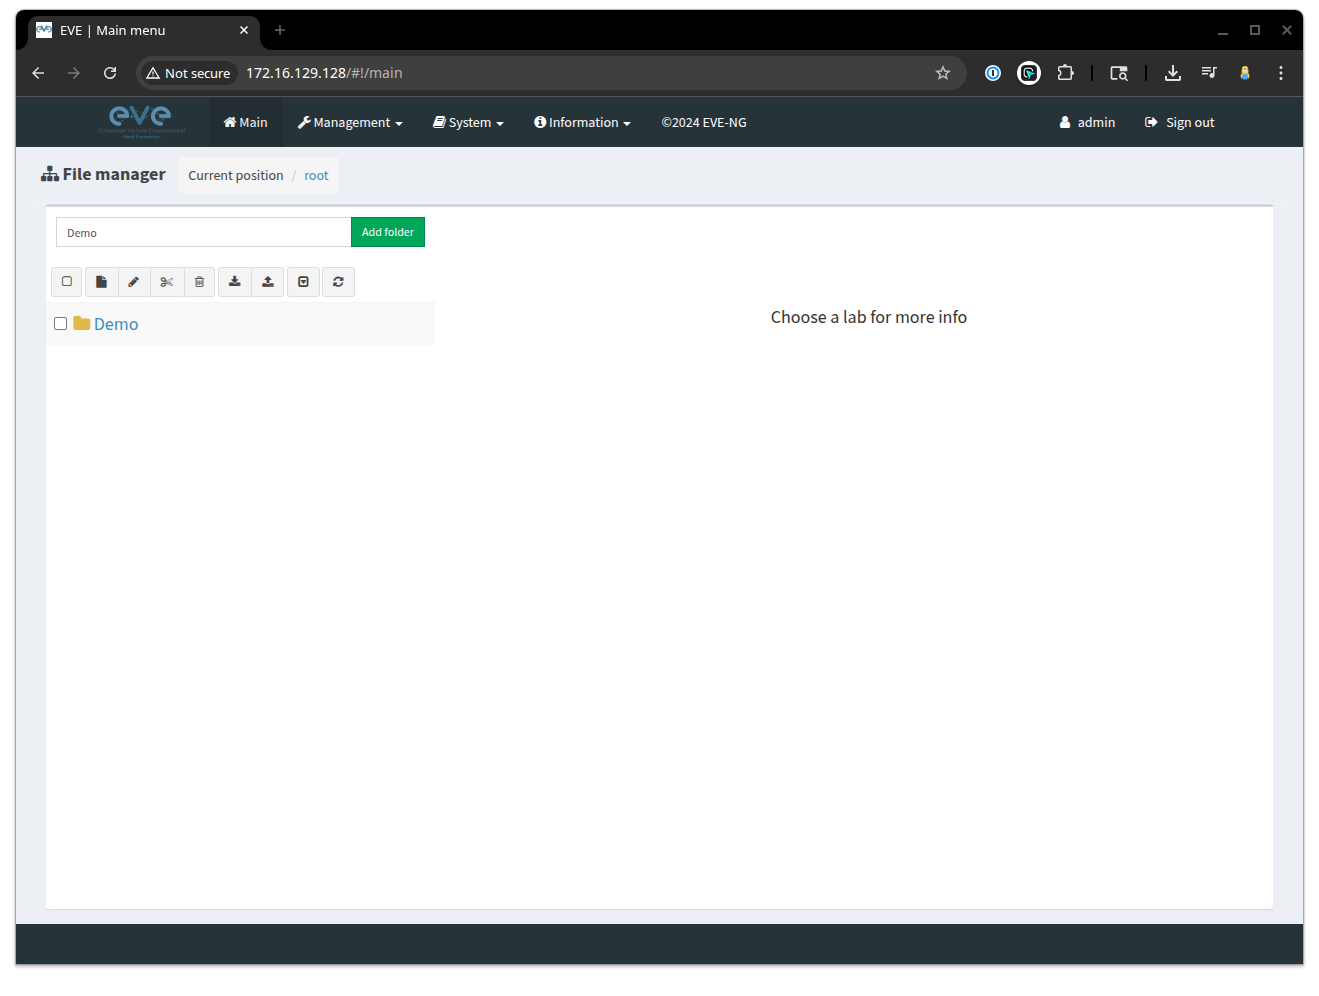
5. Create a new folder to place your lab in
For this, we are going to create a new folder called Demo, that we can use to place our labs in.
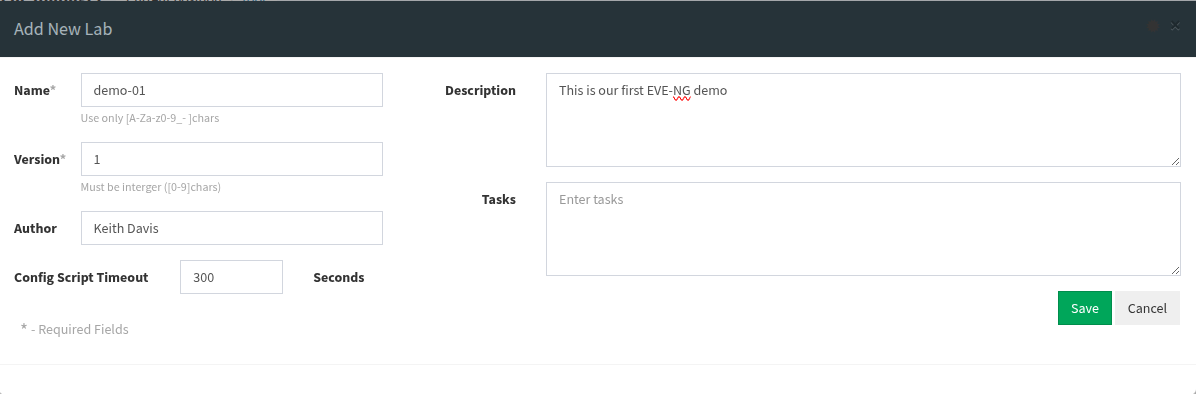
5. Create a lab
Click the "Add New Lab" button. (It looks like a folded sheet of paper). It is going to bring up the following dialog. We are going to create a lab called demo-01 as shown in the image below and then click the Save button.
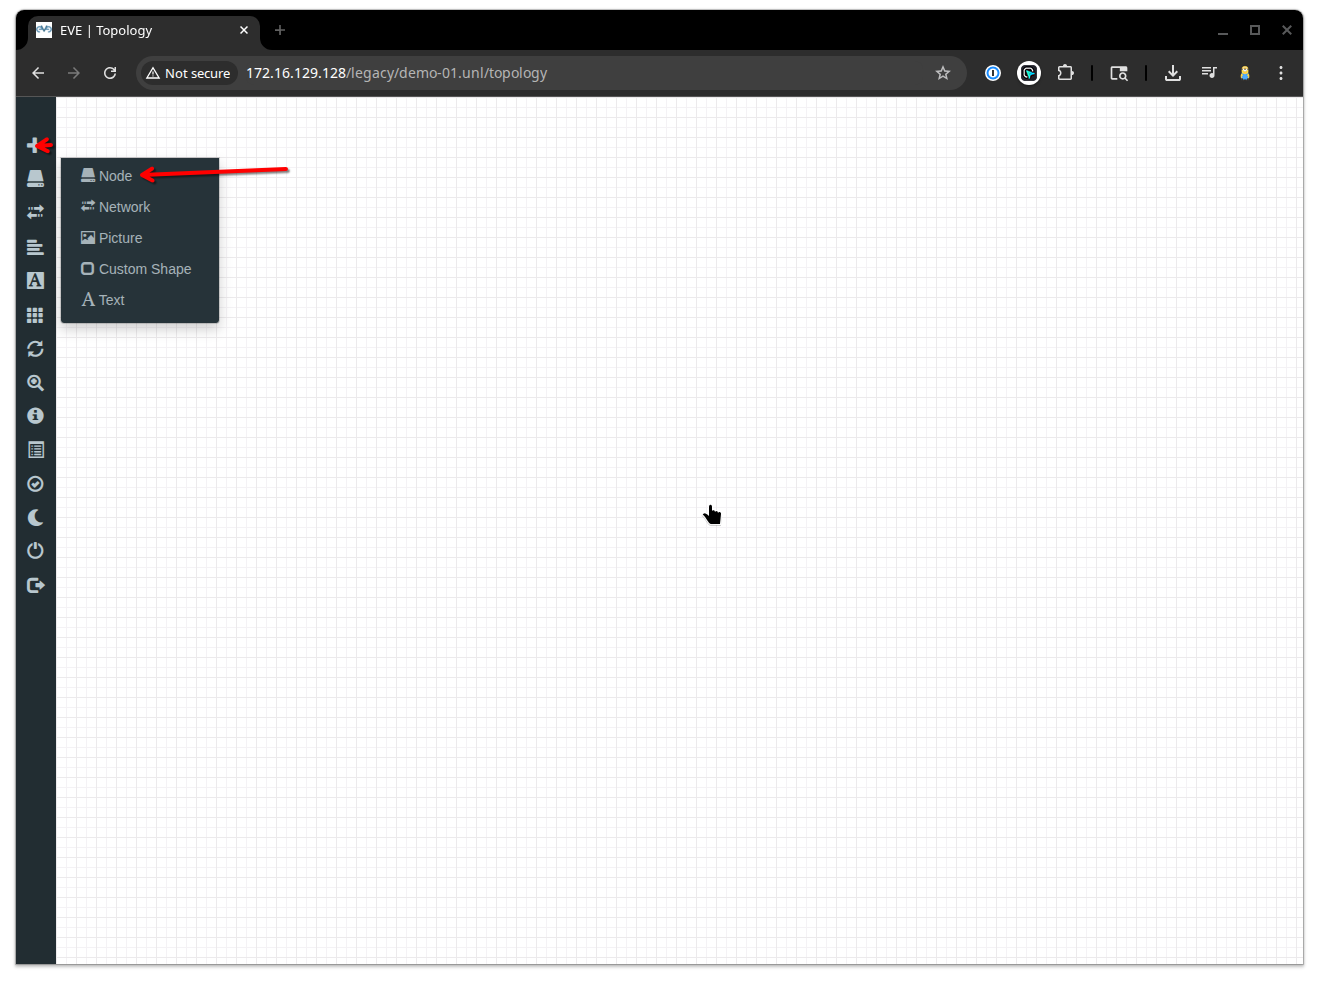
5. Add a new node to your lab
When your lab topology screen appears, click the Add an object button in the top left hand corner (the + button), followed by the Node button as shown in the image below.
5. Add a new node to your lab
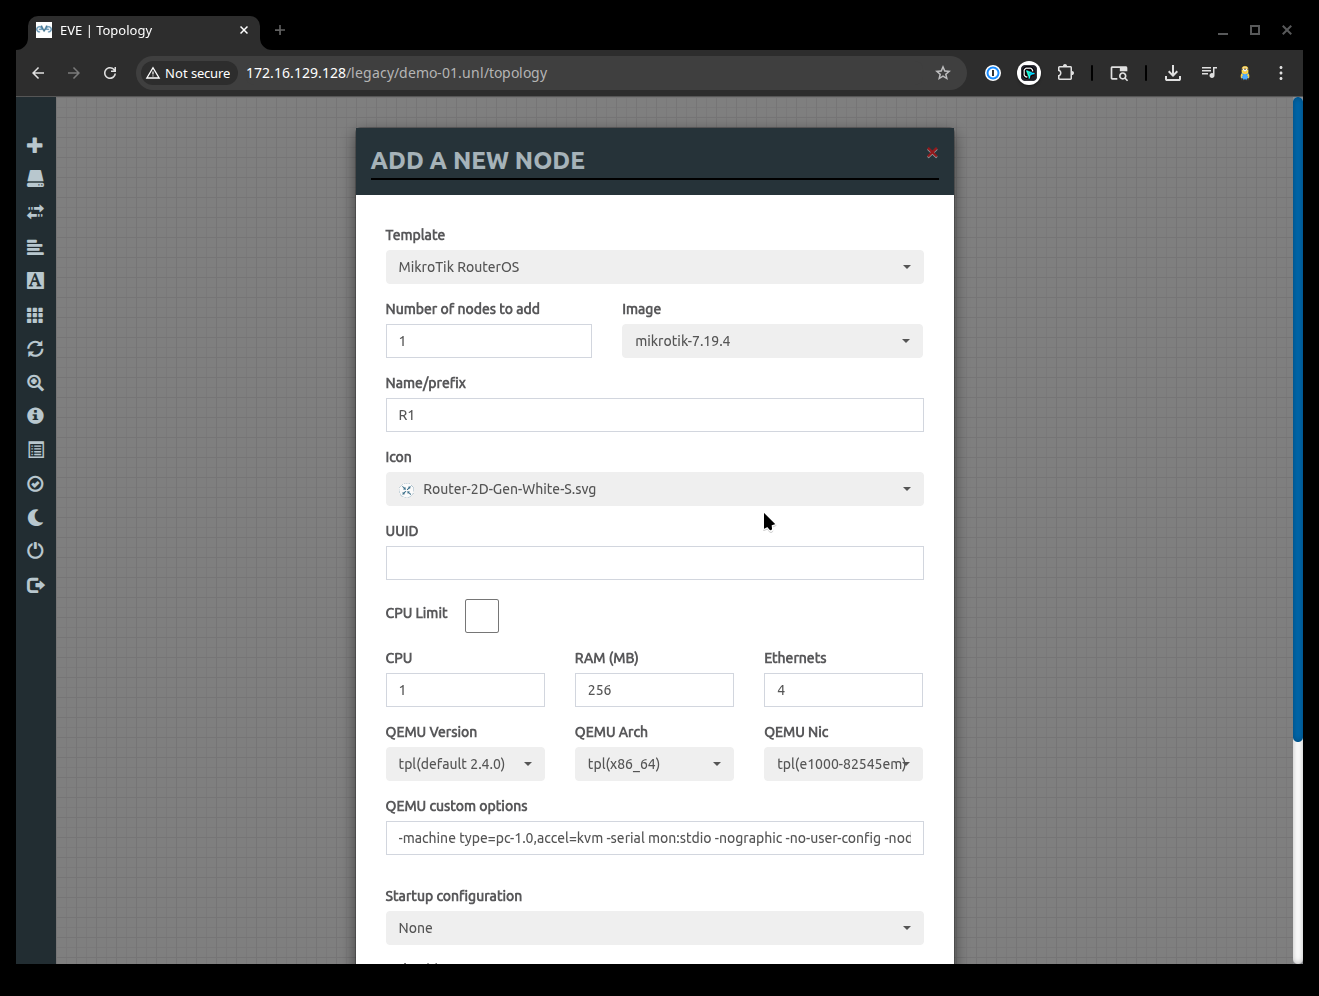
When your New Node button appears, select MikroTik RouterOS as the template. The dialog box will expand with the following options. Its a good idea to give your Router a specific Name rather than just use the default in order to distinguish your routers. We named our Router R1. We also chose to change connection type from telnet to vnc. Leave all the other settings as is, and hit the Save button to create the appliance.
5. Add your new node to the network.
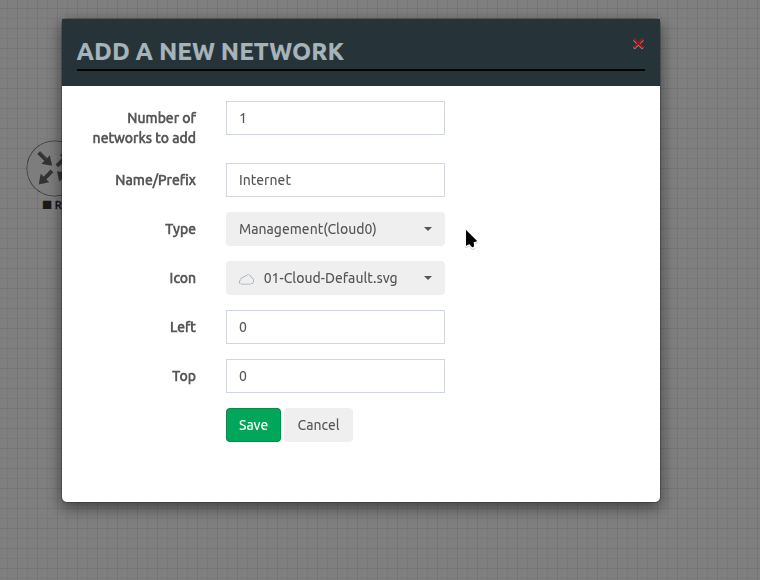
Again, we are going to click the Add an object button, but this time we are going to select Network from the dropdown. Make the following changes as shown below and click Save to confirm the changes. The reason we choose Managment (Cloud0) as our network type is so that we can access the MikroTik router interface from our host device.
5. Connect your MikroTik appliance to the Internet
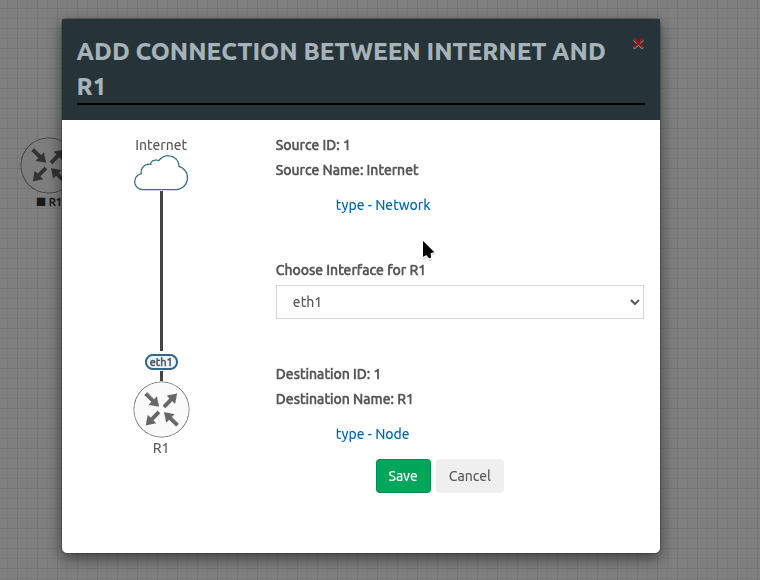
Hover over the Cloud icon of the Internet interface and you will see an orange plug icon appear. Grab and drag that plug icon from the cloud and drop it on the MikroTik router and the following window will appear. This indicates that we are connecting the eth1 interface from our MikroTik router to the interface from the Cloud, or in simpler terms, connecting the eth1 interface to our "Internet" interface. Click Save to confirm.
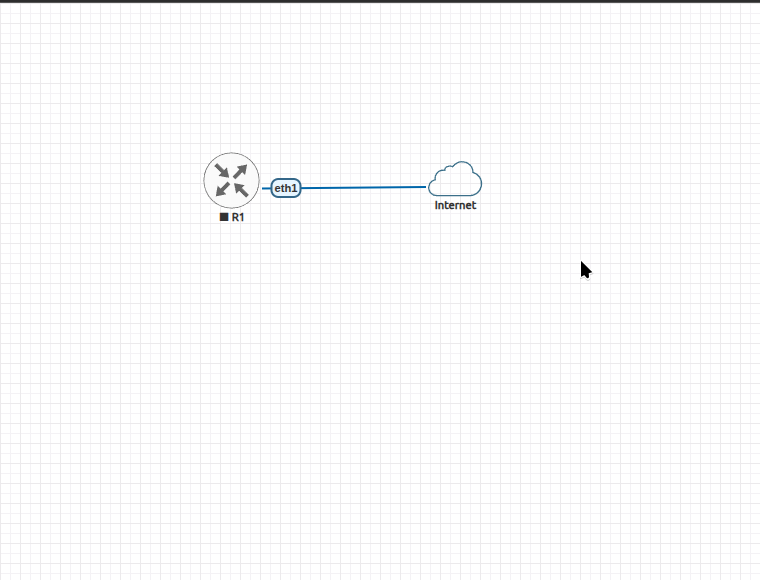
Your workspace should look like the following:
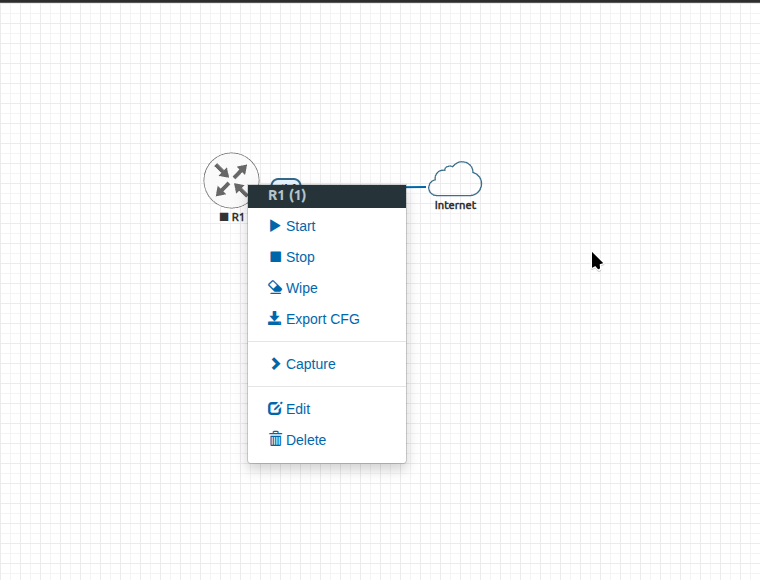
6. Start your MikroTik router
Right click on the R1 node and then Select Start from the dropdown as shown below.
6. Log In to your MikroTik router
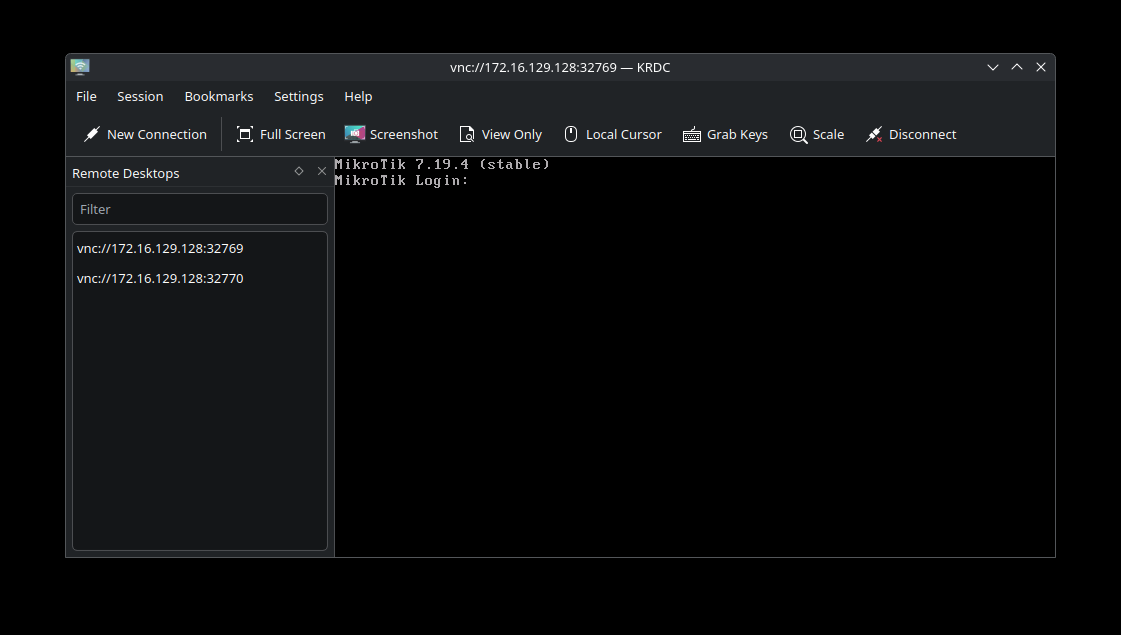
Double click the router appliance. Your browser will then attempt to open the application using the specified router protocol. I am currently on an Ubuntu machine, so I chose vnc as my connection type of choice, which launched my RDC app, KRDC, and opened my console to my router as shown below. If you are on a Windows or Mac machine, it will open the application configured for the protocol of your appliance type.
By default, the login username and password for the Mikrotik CHR router are admin for the username and no password set.
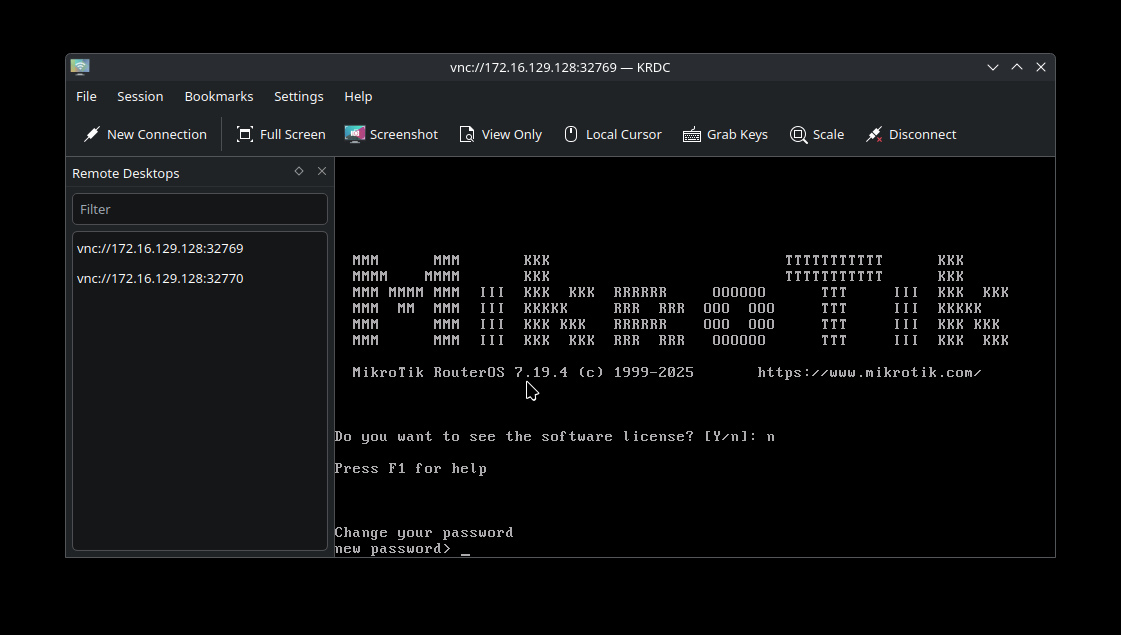
Upon first login, the router will ask you to update it's password as shown below.
If you want to see the IP address associated with the MikroTik router, run the following command at the prompt.
ip address print
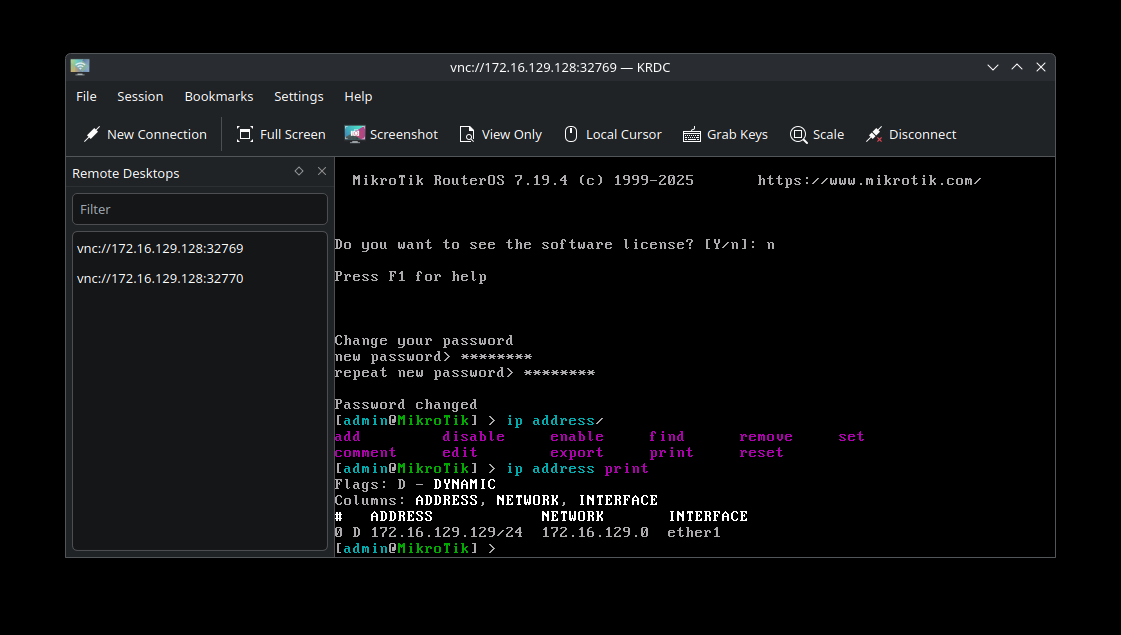
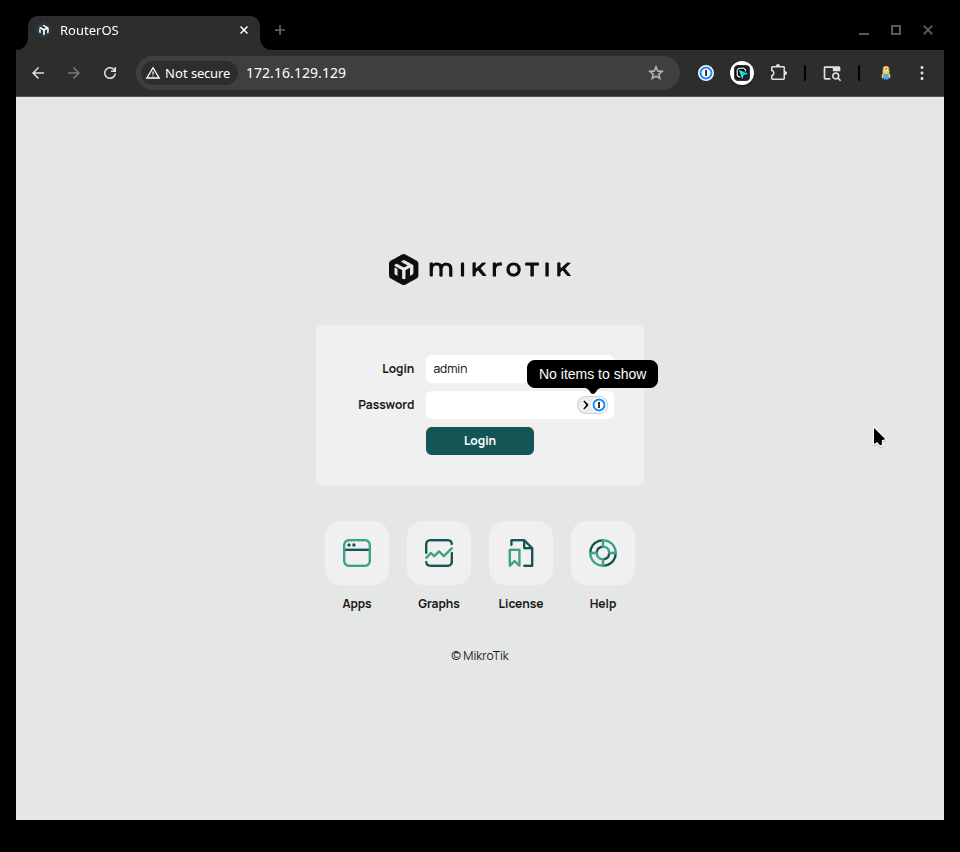
With that, we should also be able to access our newly minted MikroTik router from its web interface as well.
Congratulations! If you've made it to this point, you will have successfully created a virtual machine in VMware Workstation, installed EVE-NG to that virtual machine, and launched your first virtual MikroTik router instance.