Installing EVE-NG using VMWare Workstation (Part 2)

In Part 1 of the series, we showed you how to configure the virtual machine for EVE-NG. In this part, we show you how to install EVE-NG.
1. Start the Virtual Machine.
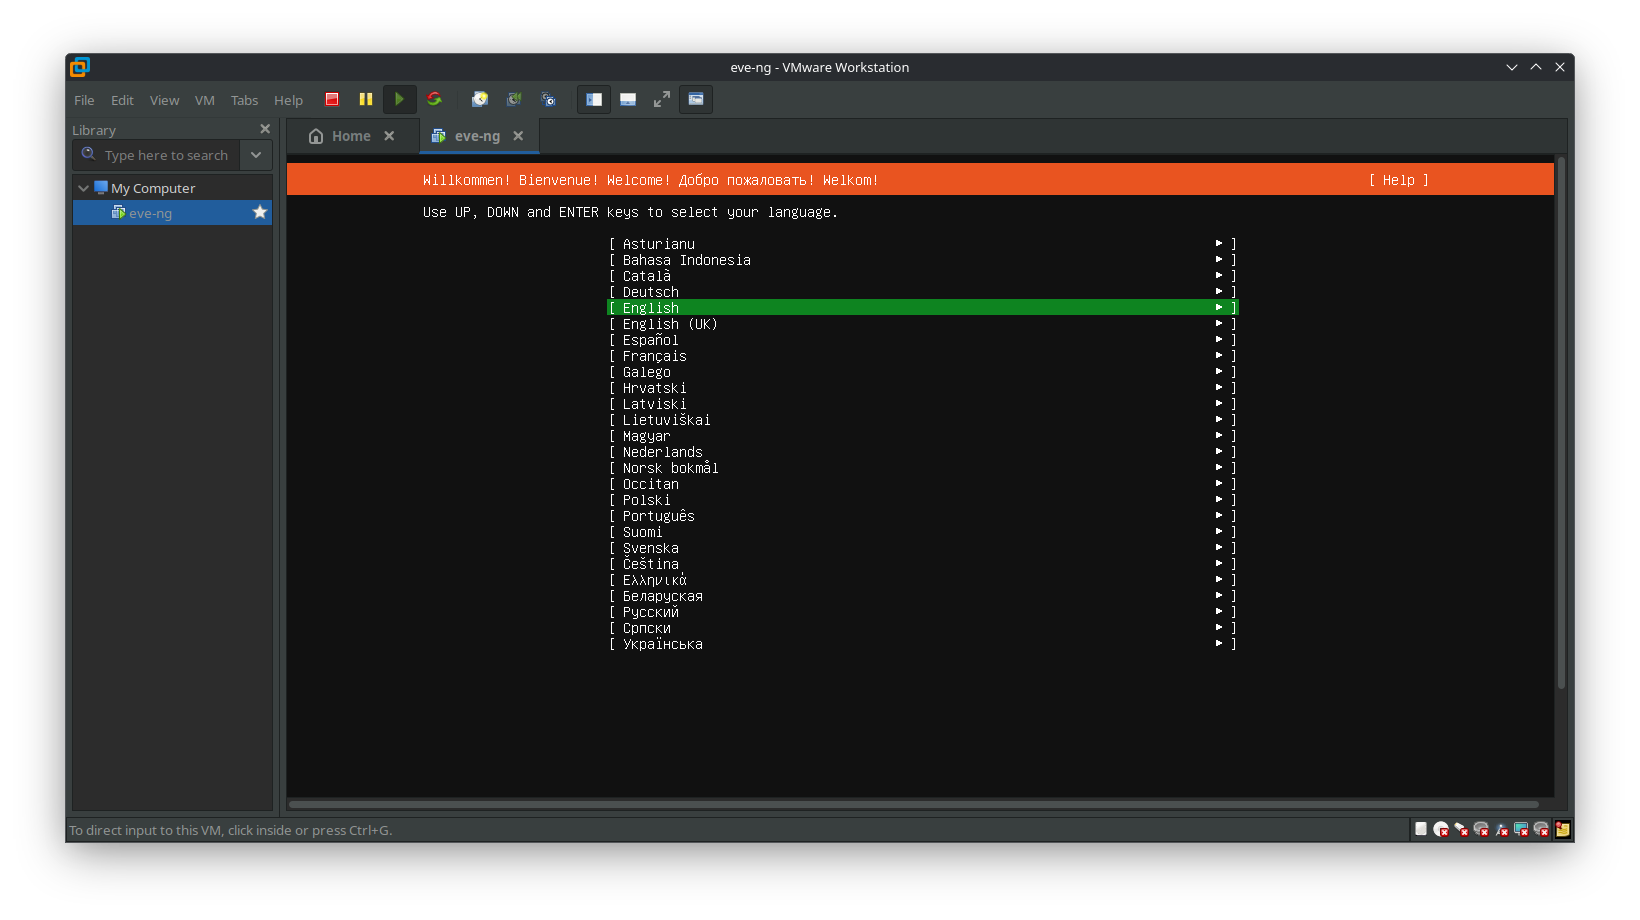
Open VMware Workstation, and select "Start up this Guest Operating System.". EVE-NG will boot from the ISO and our first task is to select our system language.
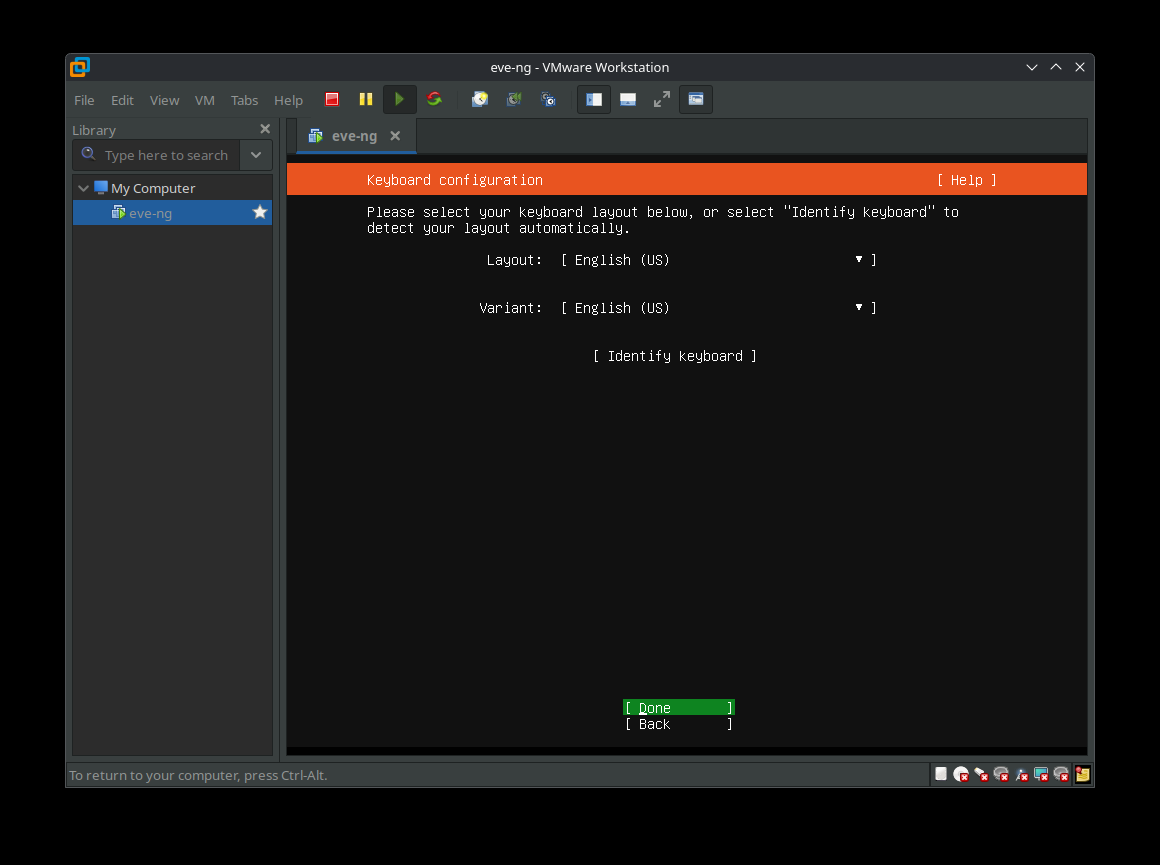
2. Specify your Keyboard Settings
Select your keyboard layout or select "Identify Keyboard" to detect your layout automatically.
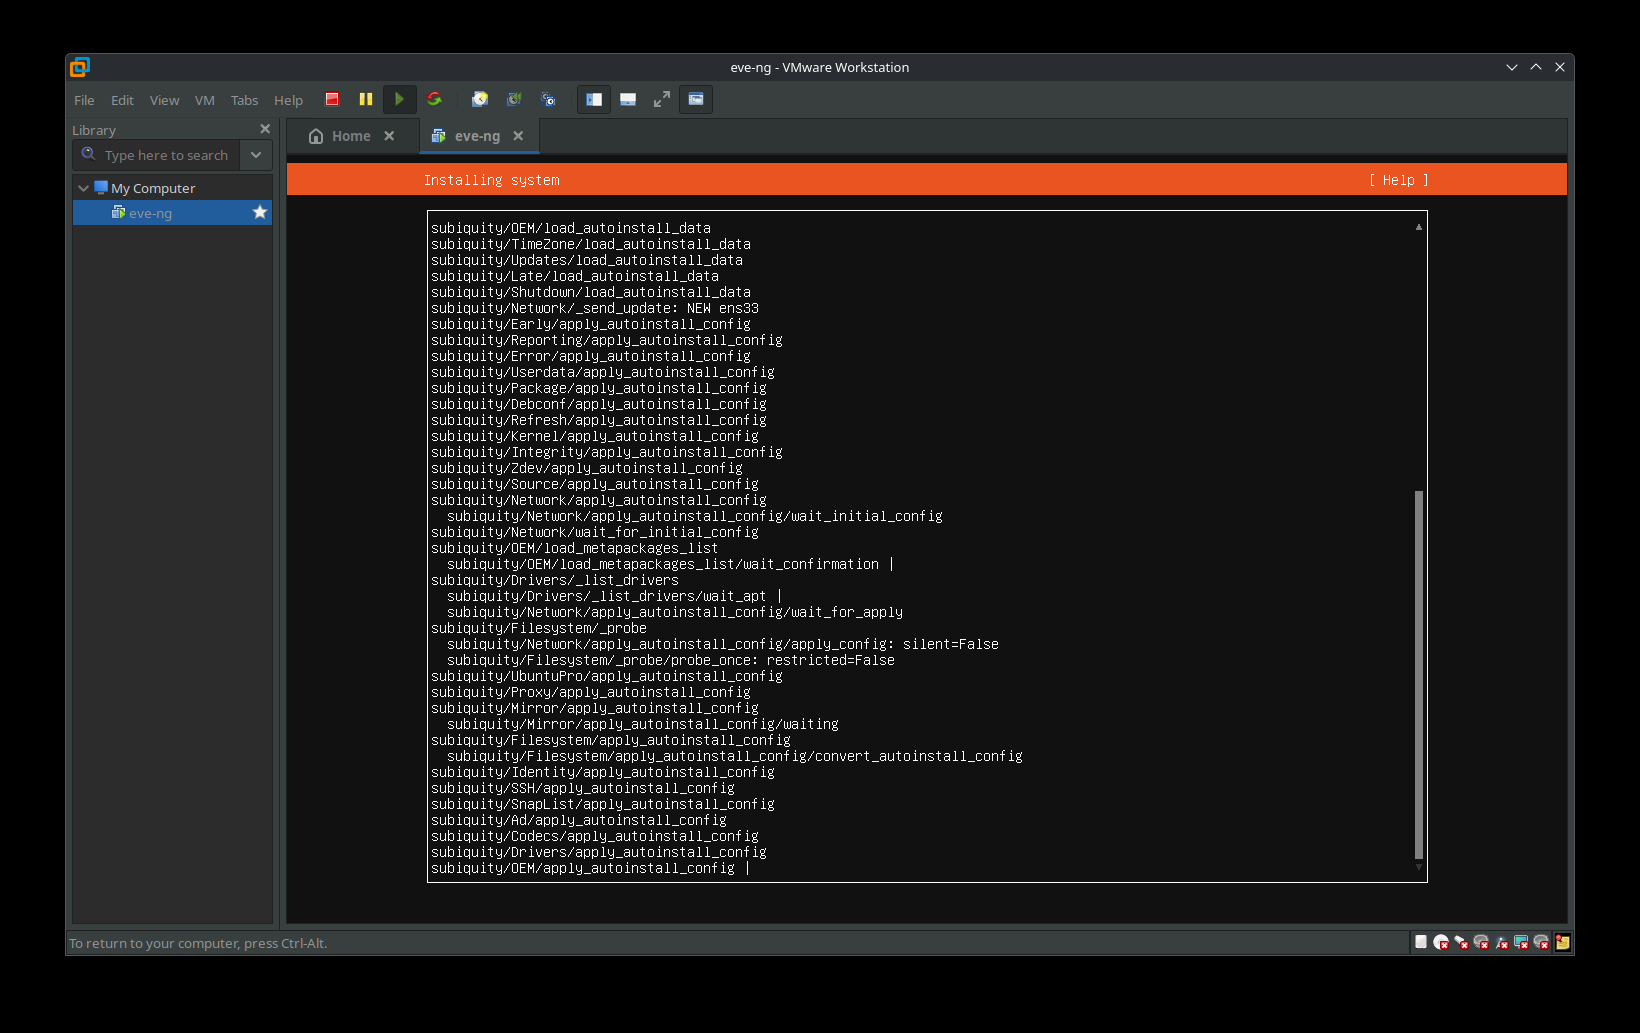
2. Prepare System for Installation
You will be prompted to confirm installation. After confirming, installation will begin.
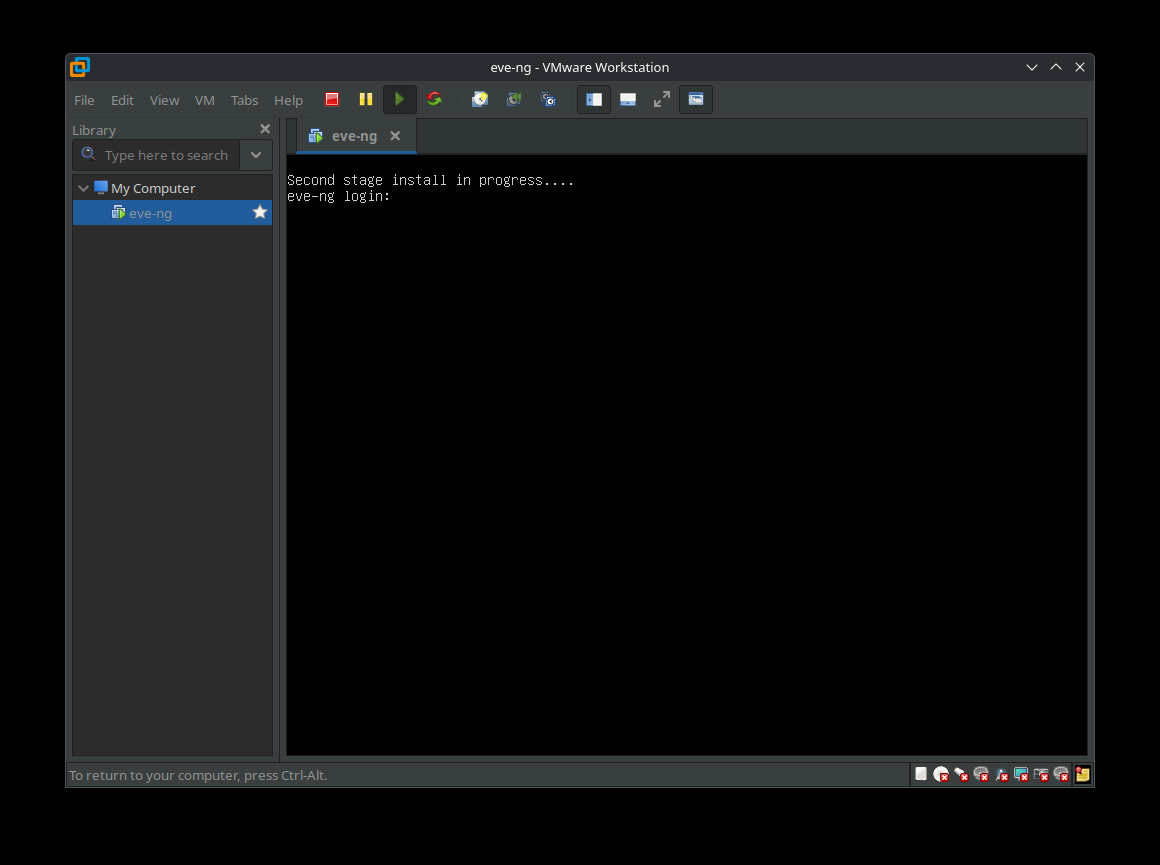
After the system installation is complete, the system will reboot and will present you with the following screen. At this point the installation is the EVE login screen will appear. The next phase of the installation will happen automatically. When you see the following screen, DO NOT login at this stage.
2. Prepare System for Installation (Continued)
After installation EVE VM will automatically reboot and the EVE login screen will appear. Login to the CLI with the username root and the password eve and continue the installation as shown below.
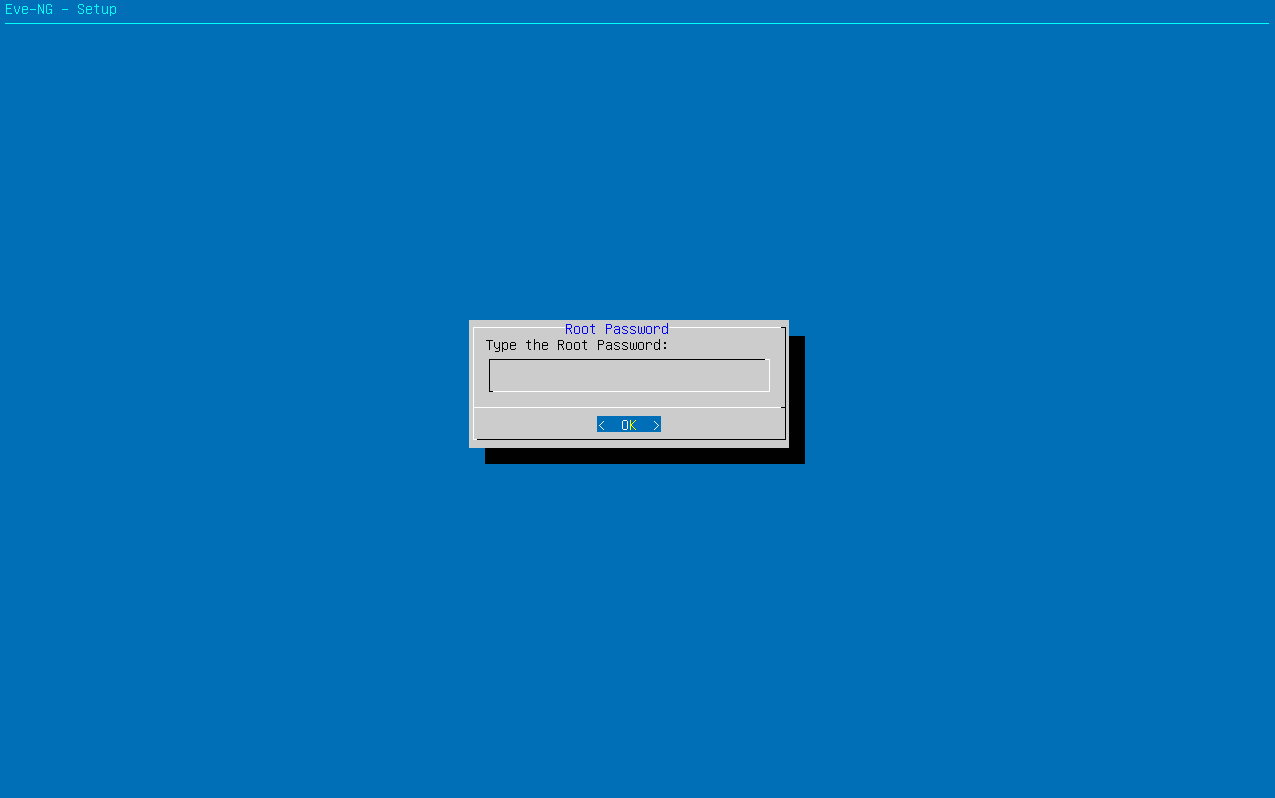
Next, it will ask you for a root password and to confirm the root password. For our local system, we just left the root password as eve. Retype the password when prompted.
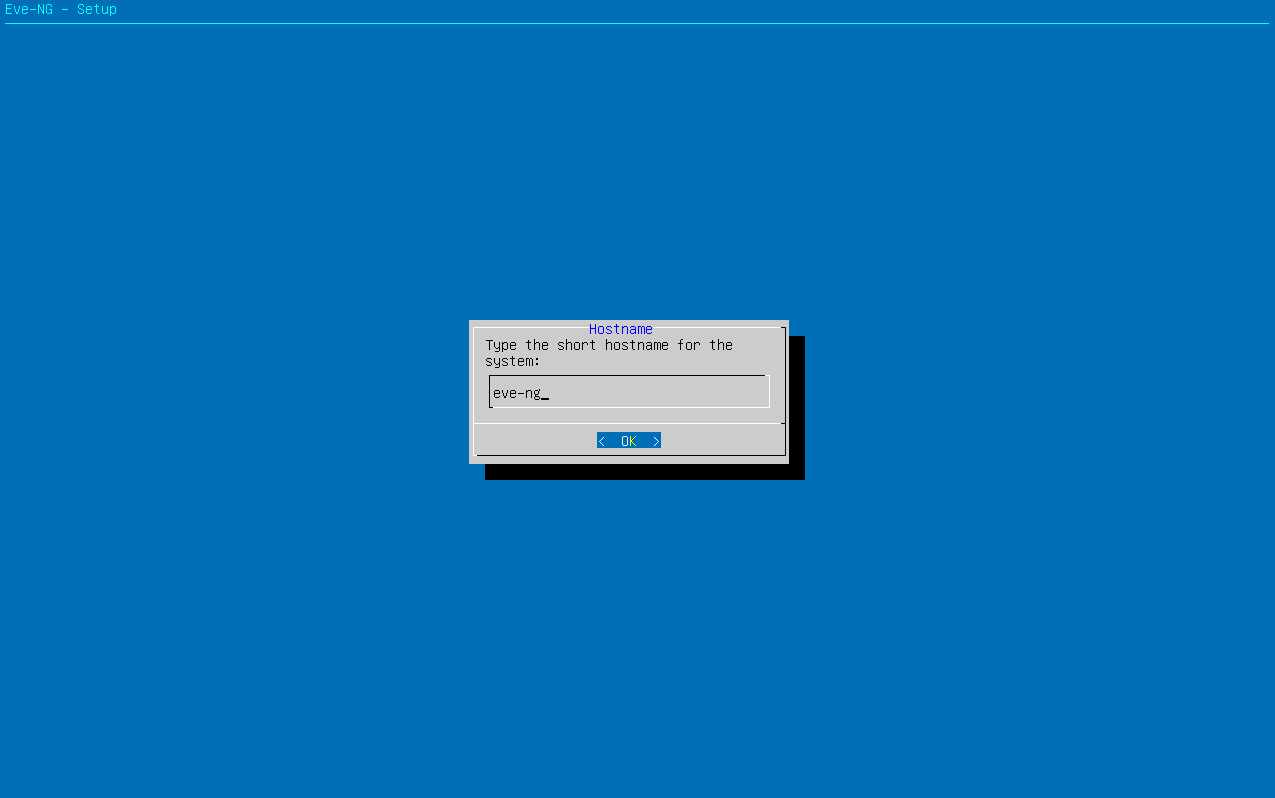
3. Enter network hostname
After entering your password, the system will ask you for a network host name. For our system, we just left the short hostname as eve-ng.
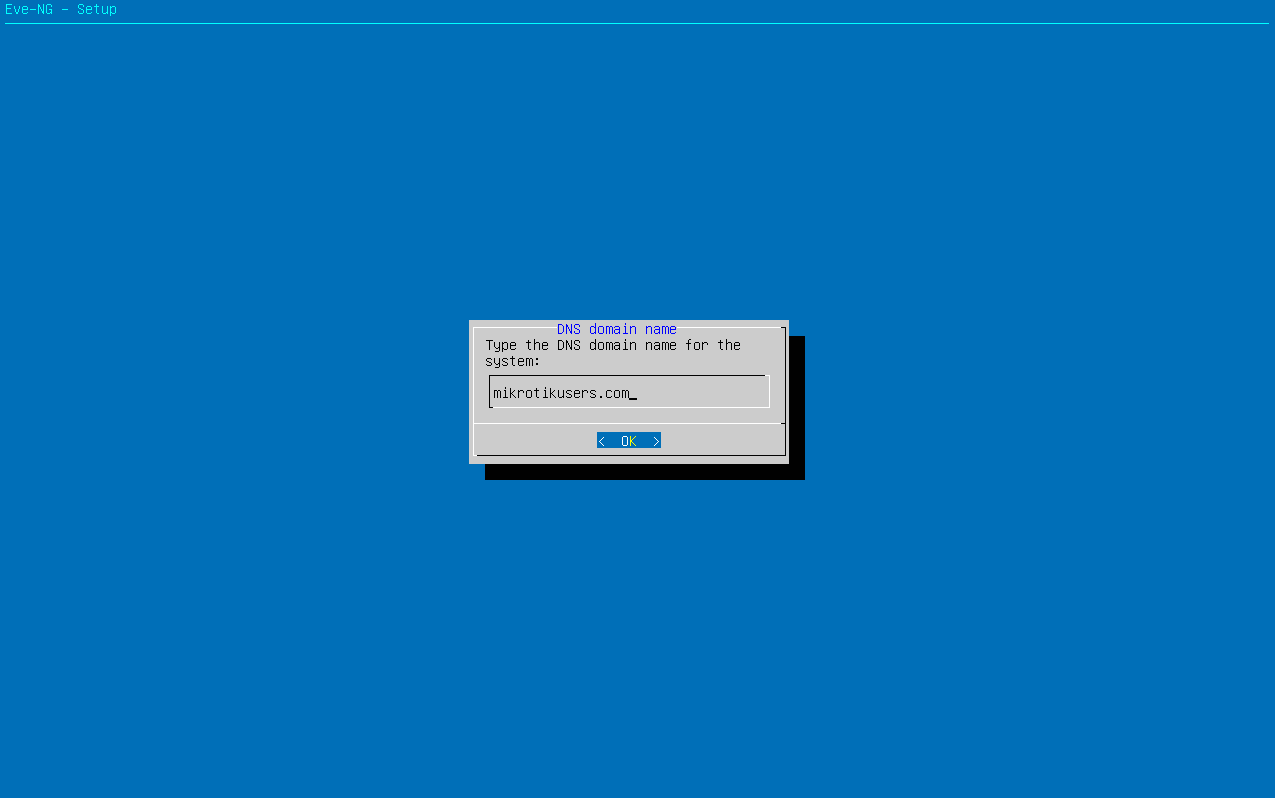
3. Enter network domain name.
Next, you will enter the DNS domain name for this instance. Again, for a local installation, you can keep the domain name as set, or change it to something more meaningful.
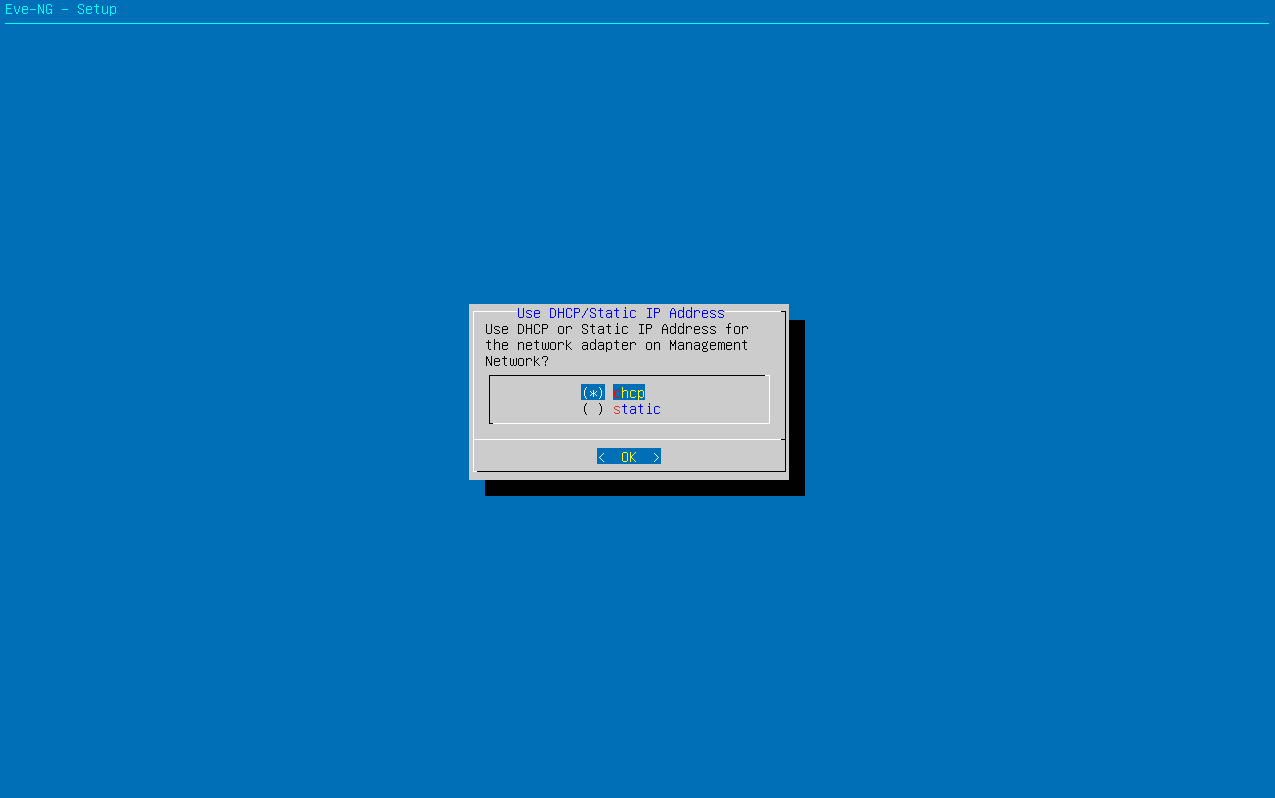
3. Set up IP Address
Setup EVE-NG Management IP address. We just chose to use DHCP.
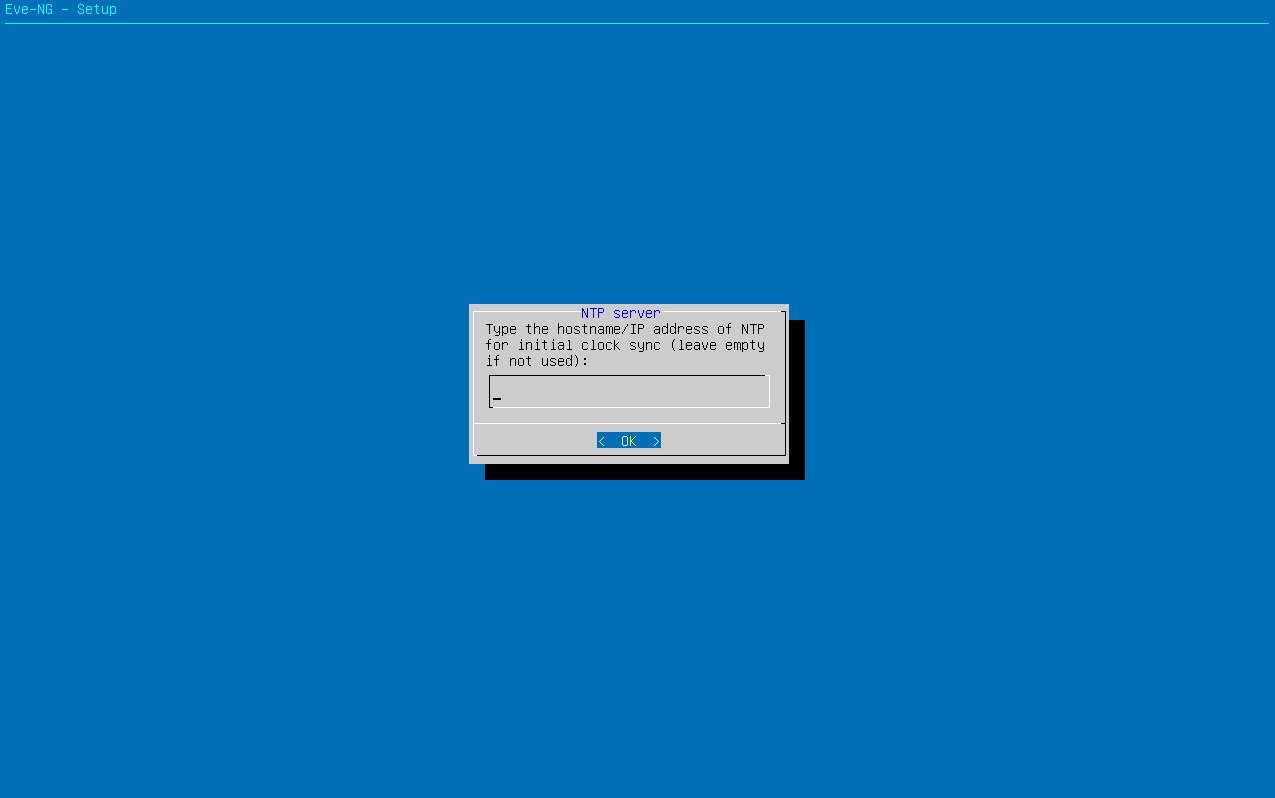
4. Set up NTP server
You can go ahead and just leave this empty.
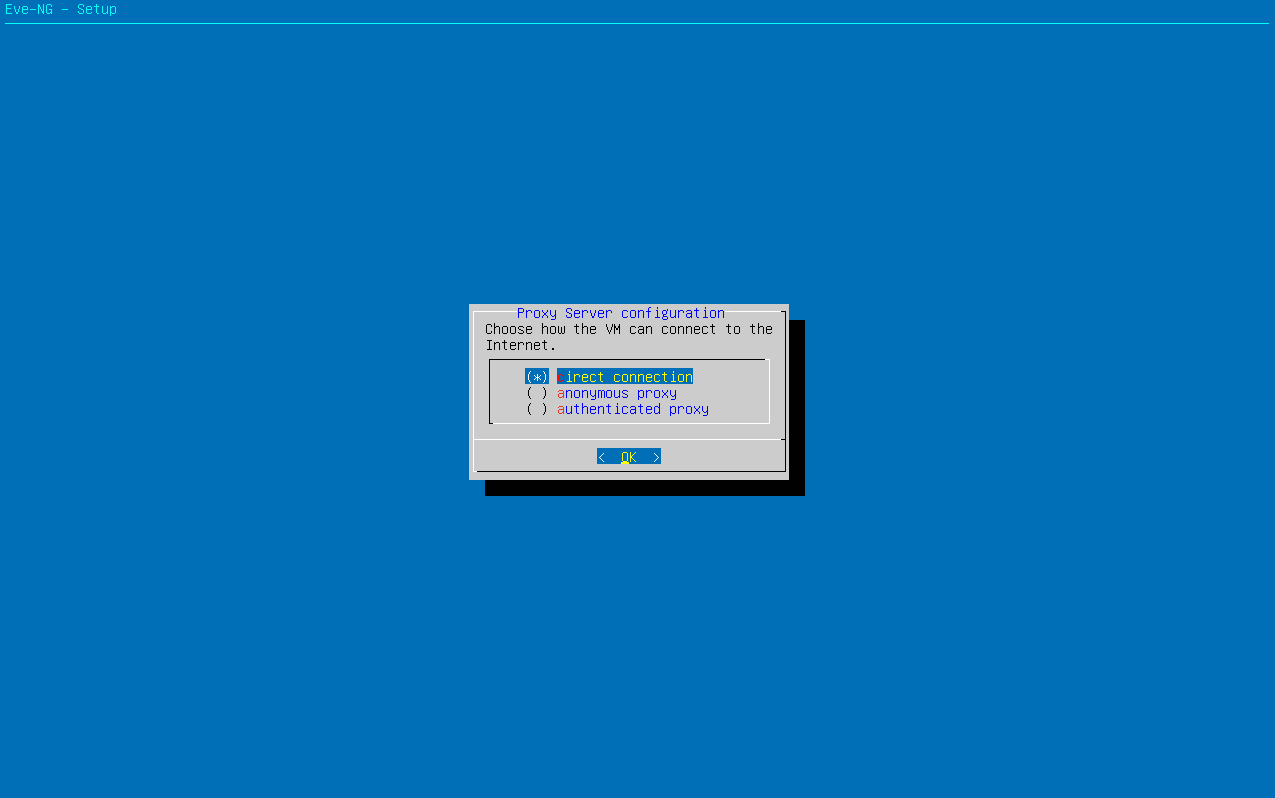
5. Set up Connection Type
For most instances, you can leave the default "direct connection." unless you use a proxy server to access the Internet. If you use a proxy server, you will need to have that information available and select the appropriate setting from the selection below.
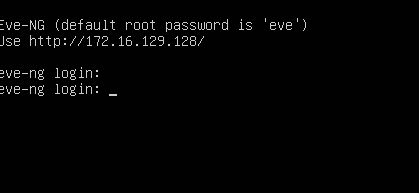
6. Connect.
After you have entered the following information, your EVE-NG system will reboot and bring you to the following screen. It will show you the IP address you need to use to access the Management IP page as shown below.
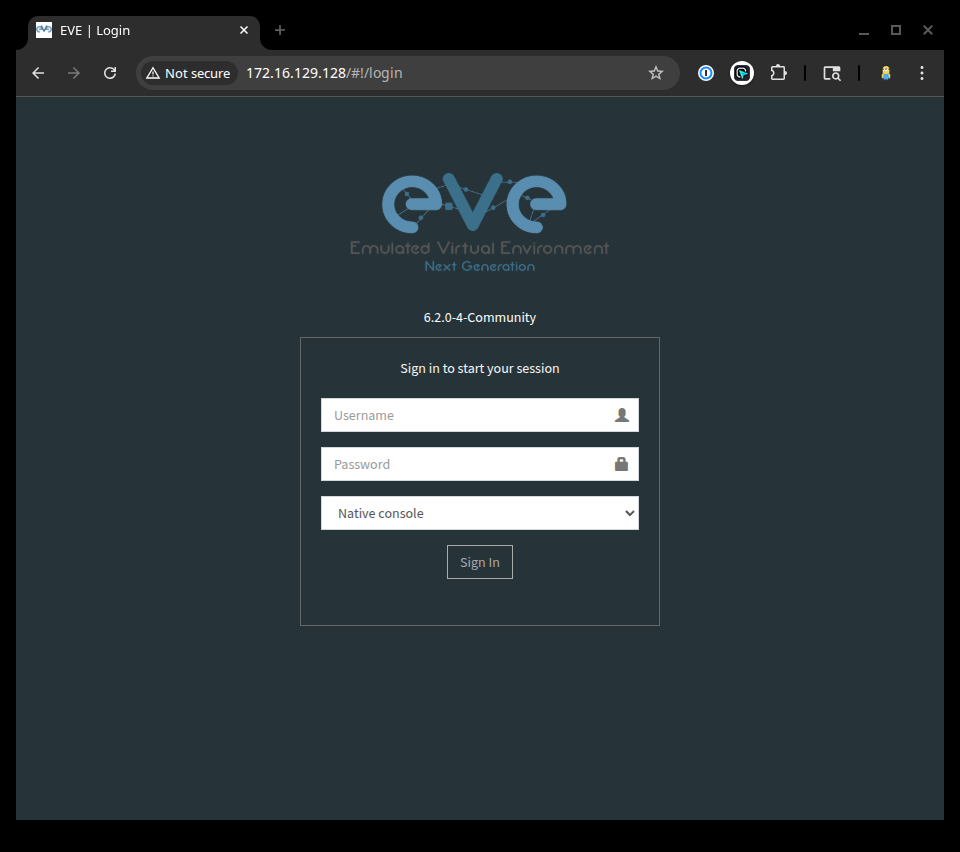
Congratulations! You have successfully installed EVE-NG on your system. In the first part of this series, we configured our VM. In this part, we installed the EVE-NG system from ISO into our VM. In the next part of our series, we are going to demonstrate how to get started with your first Mikrotik CHR image and set up your first router.