Configure DNS Services

Domain Name Services (or DNS for short) is a network management service that is used to provide IP to host name and host name to IP translation services. In short, it is what allows you to type a name into your web browser, say google.com for example, instead of having to enter an IP address such as 142.250.217.142 to reach the website. It allows you assign meaningful names to devices and services. It is essentially the phonebook of the Internet.
The goal of this tutorial is to:
Explain what DNS is and why we use it
Create a DNS server for our local network
Attach two devices to our network and assign each device a DNS name entry
Attempt to reach the devices by their DNS name entry instead of IP
Why do we use DNS?
In short, DNS makes it very easy for us to find things on our network and the Internet. It is a lot easier to remember names such as nike.com, google.com, disney.com instead of remembering 18.65.3.52, 142.250.217.142, and 130.211.198.204. We also make use of DNS internally, such as server1, server2, printer1, etc.. instead of having to remember them by a series of numbers.
To understand more about DNS and how DNS works, please check out this article. For now, we are going to assume that you are familiar with DNS and are here to get a DNS server up and running on MikroTik hardware. We are going to configure our router to provide DNS services to clients. We are going to start with the following example.
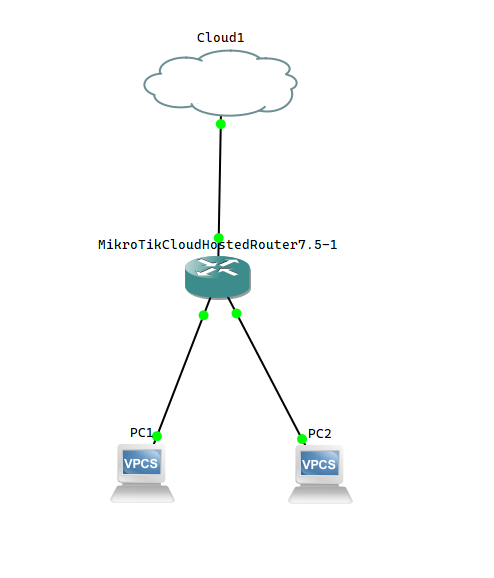
From PC1, lets try to ping PC2.
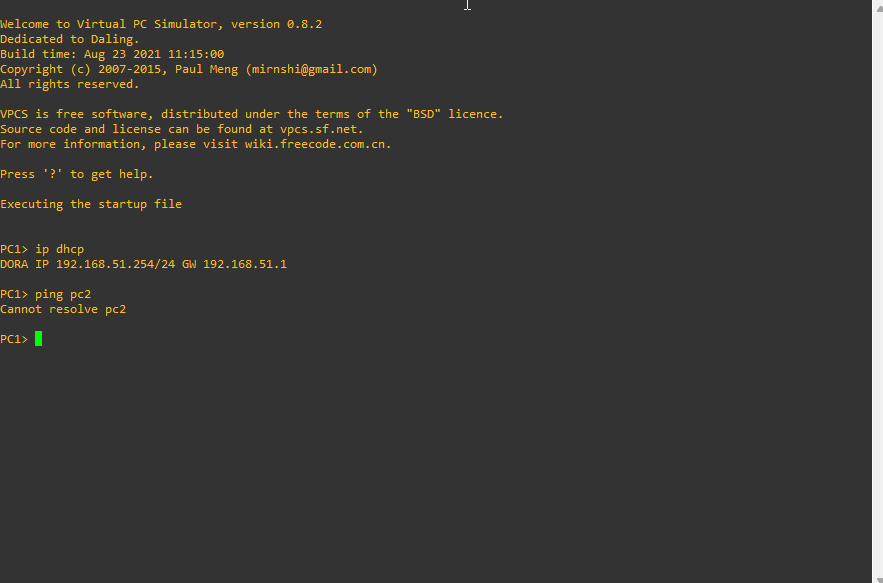
As you notice, the ping failed because PC1 couldn't resolve the name entry for PC2, meaning that it could not find a DNS server that could translate the name PC2 to its corresponding IP address. We will resolve this issue by setting up DNS services on our router and adding the entries for PC1 and PC2 to their corresponding IP addresses.
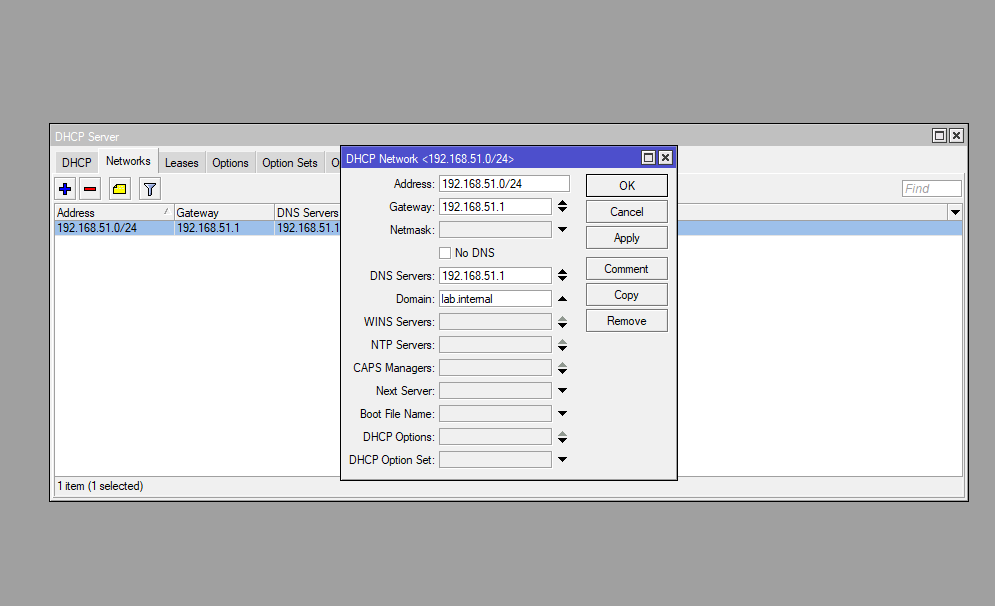
Before we configure DNS, we are going to make a slight adjustment to our DHCP configuration. For this adjustment, we are going to add a domain and set the DHCP DNS server to the IP address of our bridge.
Step 1: Open Winbox and navigate to IP -> DHCP and click the Networks tab. Double click the entry corresponding to the DHCP network our machines are on (in this case it should be the first entry) and in the DNS Servers tab, enter 192.168.51.1 (the address of our bridge), and in Domain enter lab.internal. Our two machines will effectively reside at pc1.lab.internal and pc2.lab.internal when we are complete.
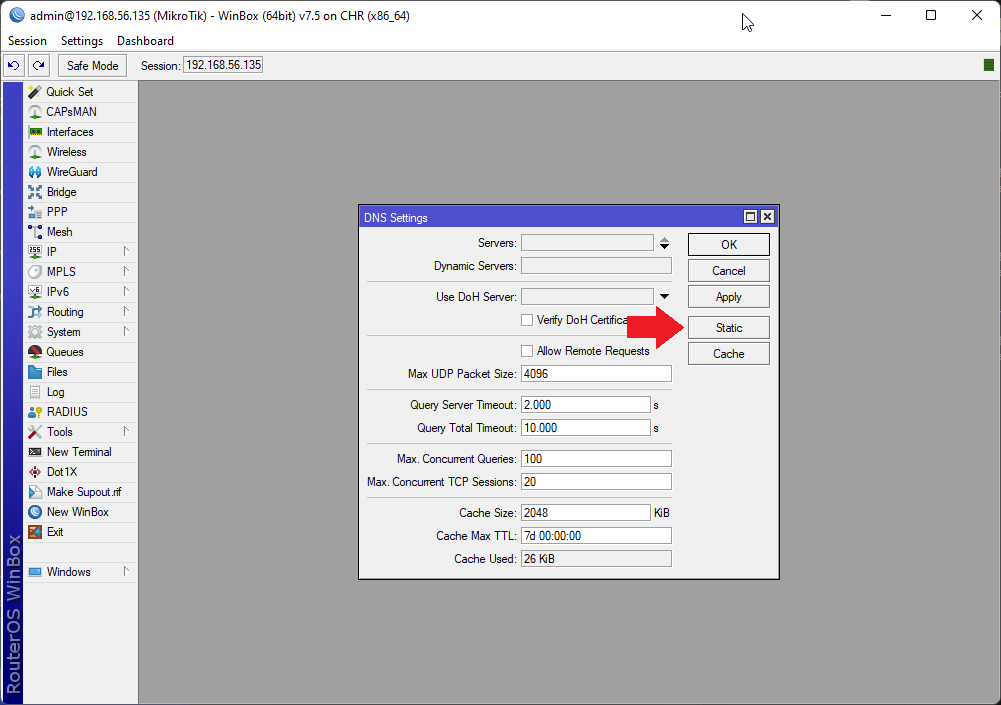
Step 1: Open WinBox and navigate to IP -> DNS.
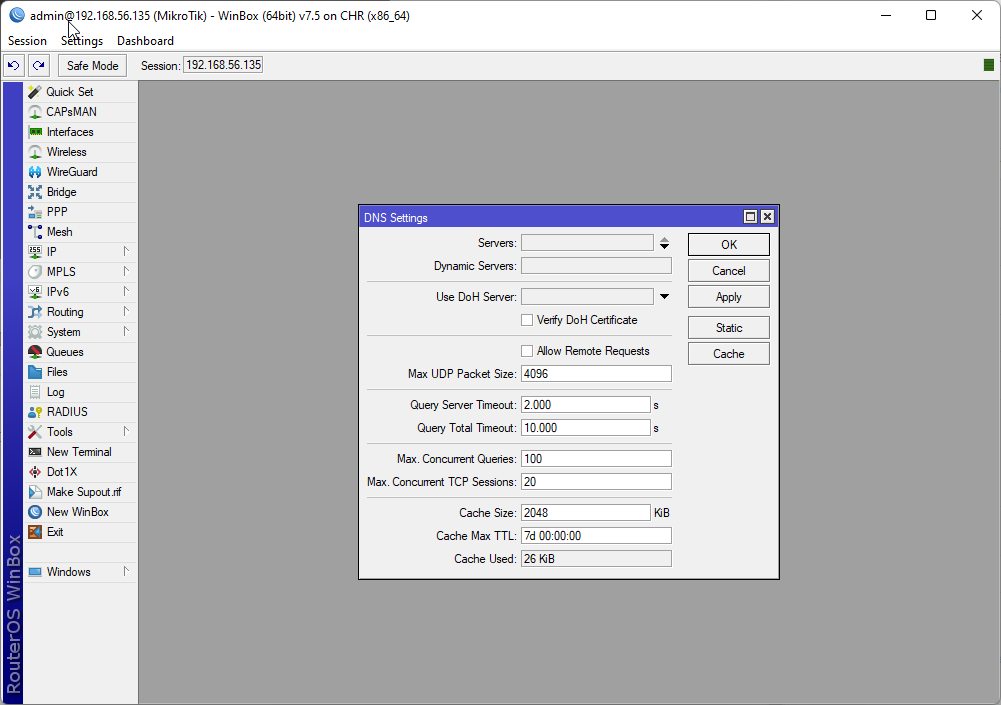
Moreover, we will list all of your options in the following to help you understand each one:
- Servers: you should enter the IP address of a DNS service on the internet or your network here. This can be your ISP's DNS servers, public DNS servers (such as google's -- 8.8.8.8 and 8.8.4.4) or local DNS servers if you have them or this router itself. Since we are going to use this router as a DNS server, enter the IP address of the bridge interface.
- Dynamic Server: If the DNS server responds by name, enter the name of the server here.
- Use DOH Server: This entry allows us to use a feature called DNS over HTTPS, which is a way to transmit DNS information securely between devices. We will cover this in a later lab.
- Allow Remote Request: Choosing this option will let you use MikroTik as a DNS server and respond to users.
- Max UDP Packet Size: This field is for specifying the final UDP packet size. DNS uses both TCP and UDP data transport protocol to send and receive information. This is set to 4096 and we should leave it set as is.
- Query Server Timeout: This entry tells the router how long to wait for a DNS server to respond to its request before giving up.
- Query Total Timeout: Entering the entire waiting time for a DNS response.
- Cache Size: Entering the amount of cache space and cache of DNS records. This entry effectively tells the router how many entries it is capable of storing.
- Cache max TTL: DNS TTL (time to live) is a setting that tells the DNS resolver how long to cache a query before requesting a new one. If the DNS resolver gets a request and the request is in its cache, the router will respond to the request, otherwise it will attempt to resolve the entry and then if that entry is successful, it will cache the entry again.
- Cache Used: This entry shows how much of the cache space is used.
Step 2: Enable Allow Remote Requests to turn DNS caching on. This enables the router to respond to DNS requests.
Step 3: Click the Static button, because we are going to add two static DNS entries to our router, one for PC1, and another for PC2.
Step 4: Click the + button to add a new static DNS assignment. The following screen will be shown.
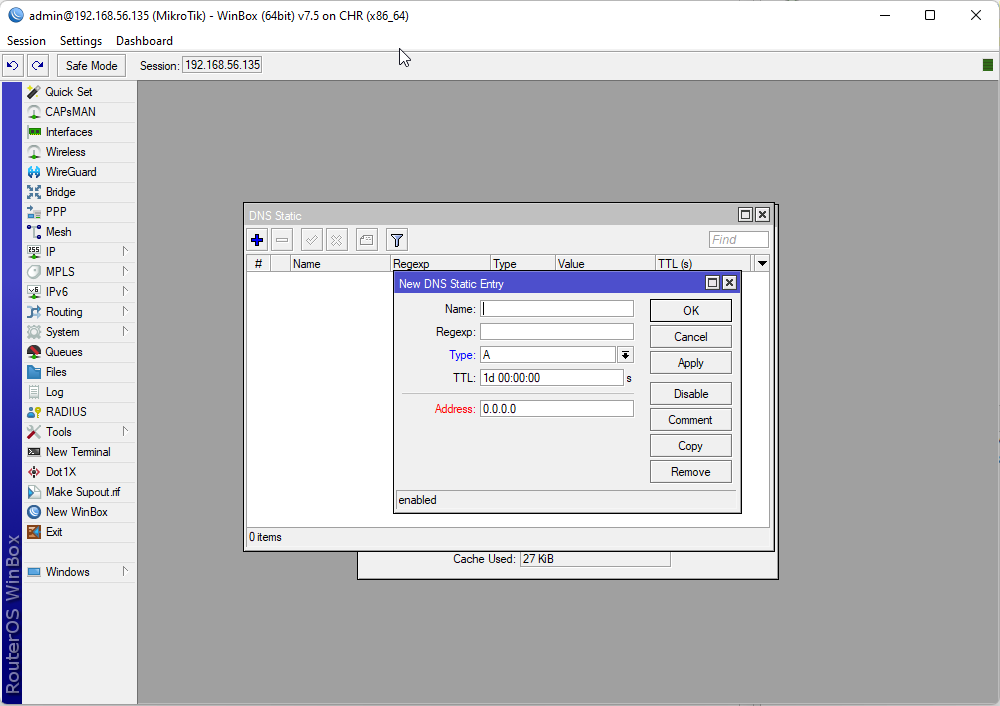
We are going to create two A records, one for PC1 and one for PC2. DNS A records are entries that match a domain name to an IPv4 address.
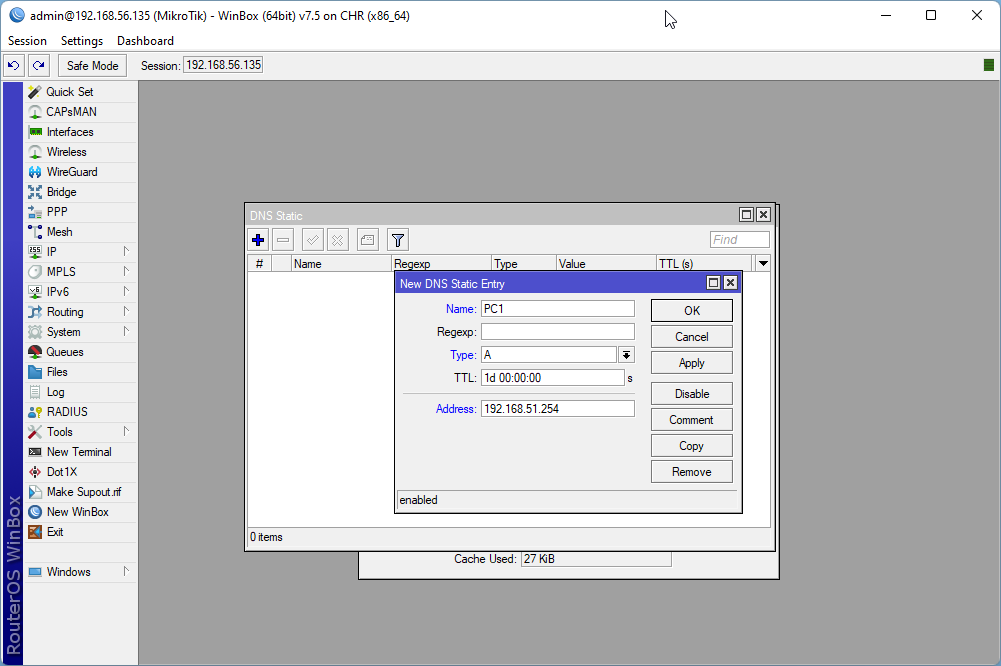
Step 5: Enter the information as shown here and hit OK or Apply to save the record.
Name: pc1.lab.internal
Type: A
Address: 192.168.51.254
Step 6: Repeat for PC2.
Name: pc2.lab.internal
Type: A
Address: 192.168.51.253
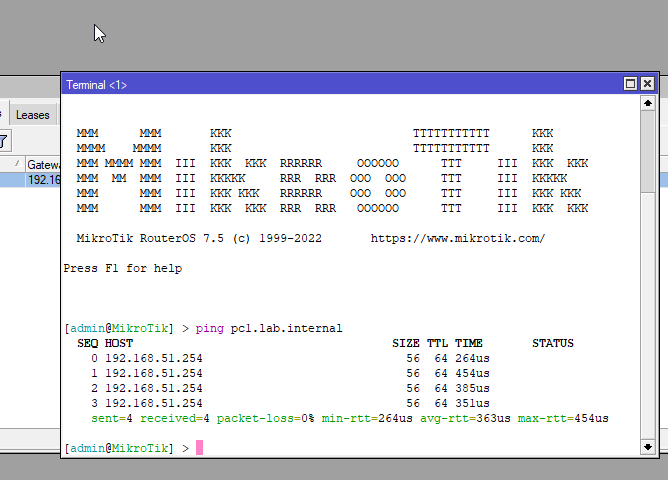
We can test that this worked from the router itself by opening a terminal window (New Terminal) and issuing a ping to each of the machines. For example, to ping pc1.lab.internal, enter the following
ping pc1.lab.internal (repeat for pc2.lab.internal)
If that worked, lets test from our machines. Double click on any one of the two VPCS machines to open the device console, and from there, try to ping the other machine. For example, if you are on pc2, then try to ping pc1.lab.internal.
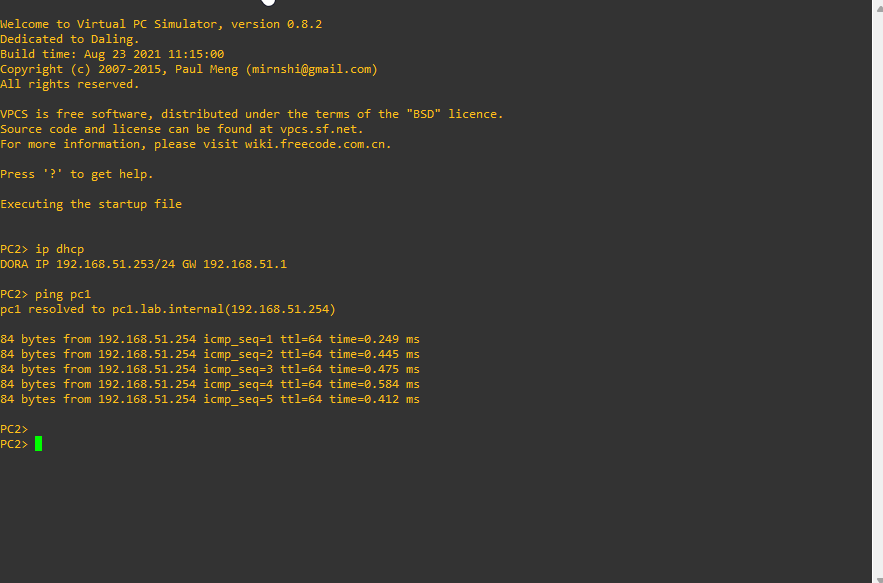
If successful, congratulations! You have set up and configured DNS on the MikroTik router.