Backing up and restoring a MikroTik Router

Backing up and restoring a MikroTik router is a critical task for maintaining network stability and ensuring you can recover quickly in case of issues. MikroTik's RouterOS provides built-in tools to handle these tasks. Here’s a step-by-step guide on how to back up and restore your MikroTik router:
Quick Tip: If you need to enable ssh on your router, you can enable it from IP -> Services.
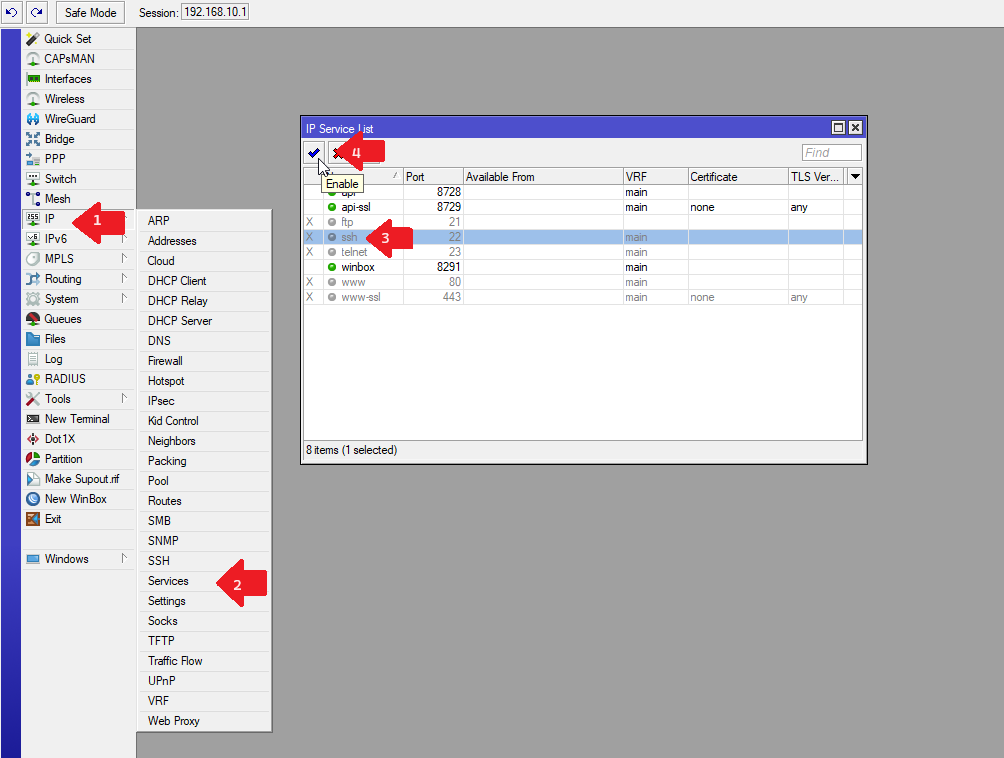
or you can enable it via the CLI
/ip service set ssh disabled=no
Steps to backup a MikroTik router
Via Winbox/WebFig
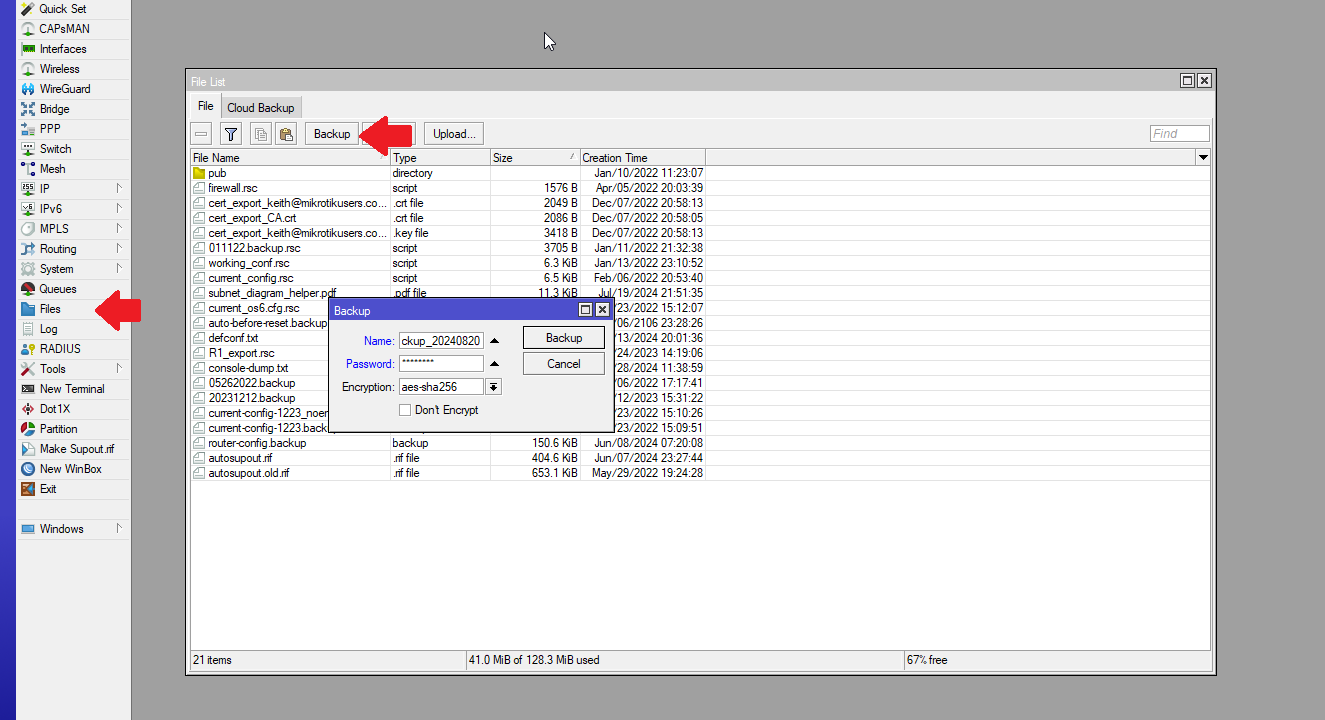
- Navigate to Files on the Winbox main menu. From the Files windows that appears, click the Backup button and enter a name (and optionally a password) and click the Backup button on the file entry window to create your backup file. The file will then be stored directly on the device. From there, you can drag the file from the list to your desktop PC.
Via CLI
Save file without password
system backup save name="backup_20240820.backup"
Save file with password
system backup save name="backup_20240820.backup" password="<enter password here>"
From there, if you have SSH enabled on the router, and you have SSH tools installed on your local machine, you can use SCP from your local machine to copy the file from your router.
scp admin@<router ip address>:/backup_20240820.backup <local directory>
Should the backup fail, you'll have a backup of your system that you can restore from.
Steps to restore a Mikrotik router
Via Winbox/WebFig
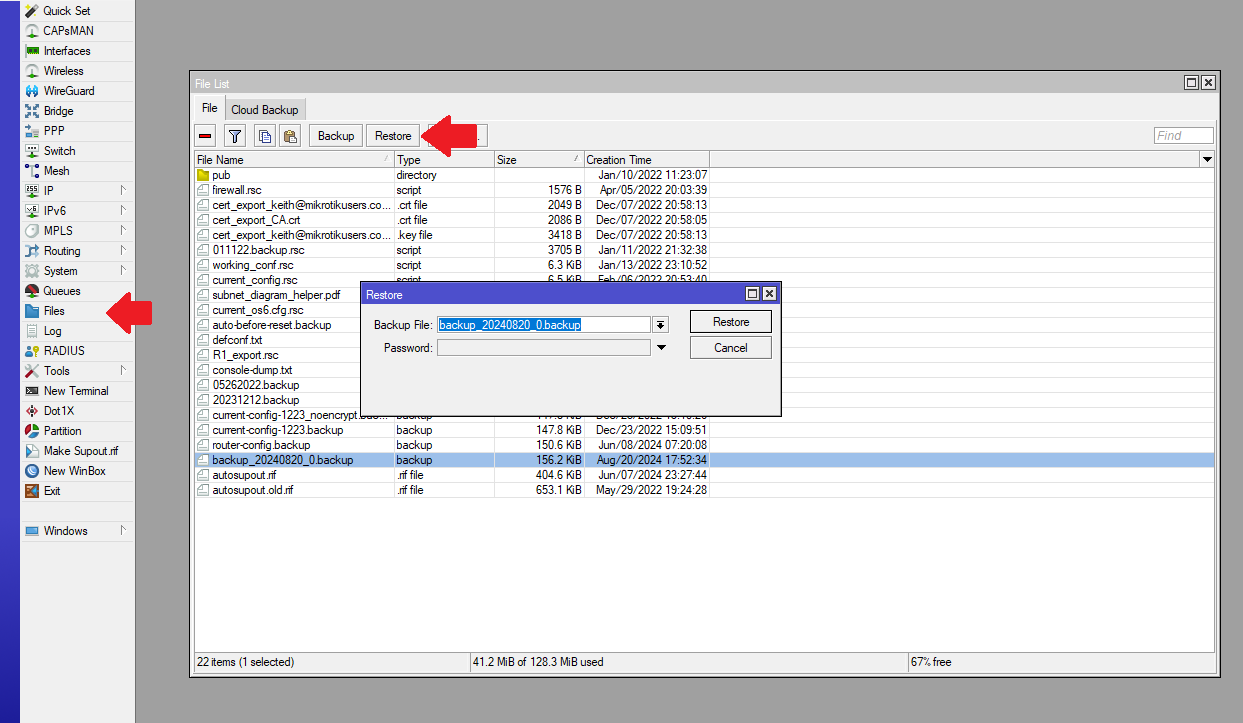
- Navigate to Files on the Winbox main menu. If you have the file saved on your local machine, you can drag the file from your local machine to the Files window to upload it to the router.
- From the Files windows that appears, select the backup file you wish to use and then click the Restore button. The Restore window will then appear with the name of the selected file, and if you did enter a password to secure the file enter the password in the Password input box and click the Restore button on the Restore window to restore the contents of your backup file.
Via CLI
- If you have SSH enabled on the router, you can use the SSH tools installed on your local machine to SCP the file from your local machine to the router.
scp <path to backup file> admin@<router ip address>:
- Run the following command to restore the backup file to your router
If file is saved without password
system backup restore file=<name of backup file>
if file is saved with a password
system backup restore file=<name of backup file> password="<enter password here>"
After restoring, the router may automatically reboot, or you might need to reboot it manually. In WinBox/WebFig, you can do this from the System > Reboot menu. In SSH, use:
/system reboot
Notes and Tips
- Compatibility: Ensure that the backup file is compatible with the RouterOS version you're using. Restoring a backup created on a different version of RouterOS might cause issues.
- Security: Always handle backup files with care. They contain sensitive configuration data that could be misused if it falls into the wrong hands.
- Test Restores: If possible, test the restore process in a lab environment before applying it to a production router to avoid any unexpected issues.
This process should help you keep your MikroTik router's configuration safe and allow you to recover quickly from any issues.