Staying Safe Online: Enabling Secure Access to an Internal Network with OpenVPN

Staying Safe Online: Enabling Secure Access to an Internal Network with OpenVPN
OpenVPN logo

First lets begin by explaining what OpenVPN is and why you would use it. Then we'll look at some common scenarios and then cover setup of OpenVPN on our MikroTik router and client installation and deployment.

So what is OpenVPN.

OpenVPN is a virtual private network (VPN) application service (server and client) which provides a securely encrypted Internet connection to your private network over the public Internet. It allows devices to connect to insecure networks (think Internet cafes, coffee shops, public Wi-Fi hotspots) but then layers a secure bridge on top of them that allows you to pass data safely and securely between them without worrying about the data or the device being compromised.

Public WiFi should be regarded as inherently insecure

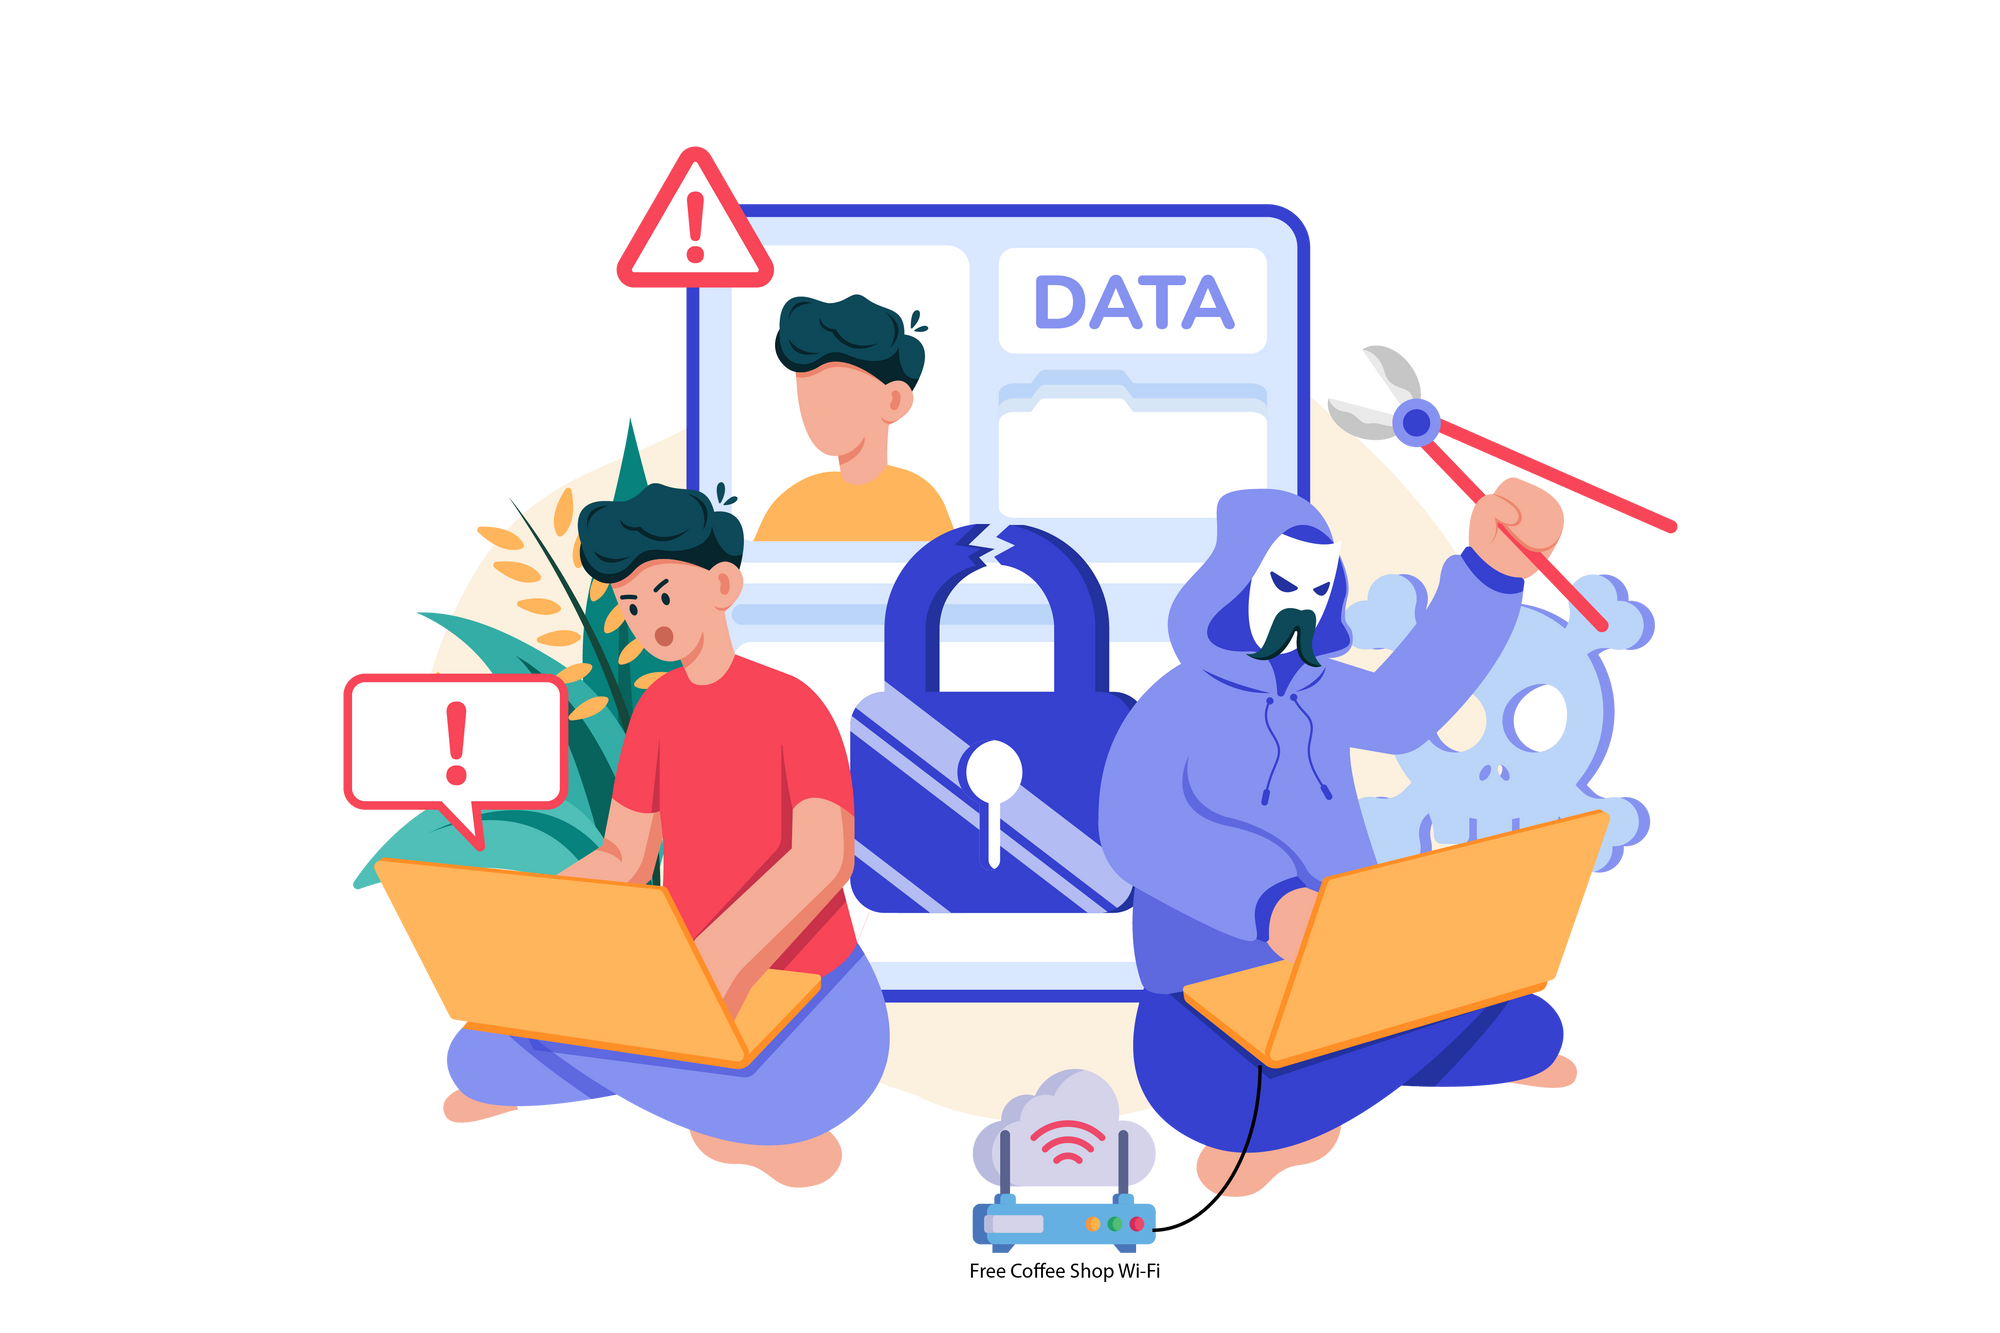
For example, think of the scenario where you connect to your local coffee shops free Wi-Fi. You are then relying on the coffee shop to ensure the security of your data and your connection. However, it is completely possible for a bad actor (a.k.a. hacker) to also be connected to the same Wi-Fi hotspot and compromise the security of that public Wi-Fi and intercept, redirect, or even manipulate your online connection. Some bad actors may even set up free public Wi-Fi access points themselves in the hopes of luring unsuspecting victims into scenarios where the above most certainly will occur. You could be redirected to malicious websites, have your information stolen, have your device compromised or even more.

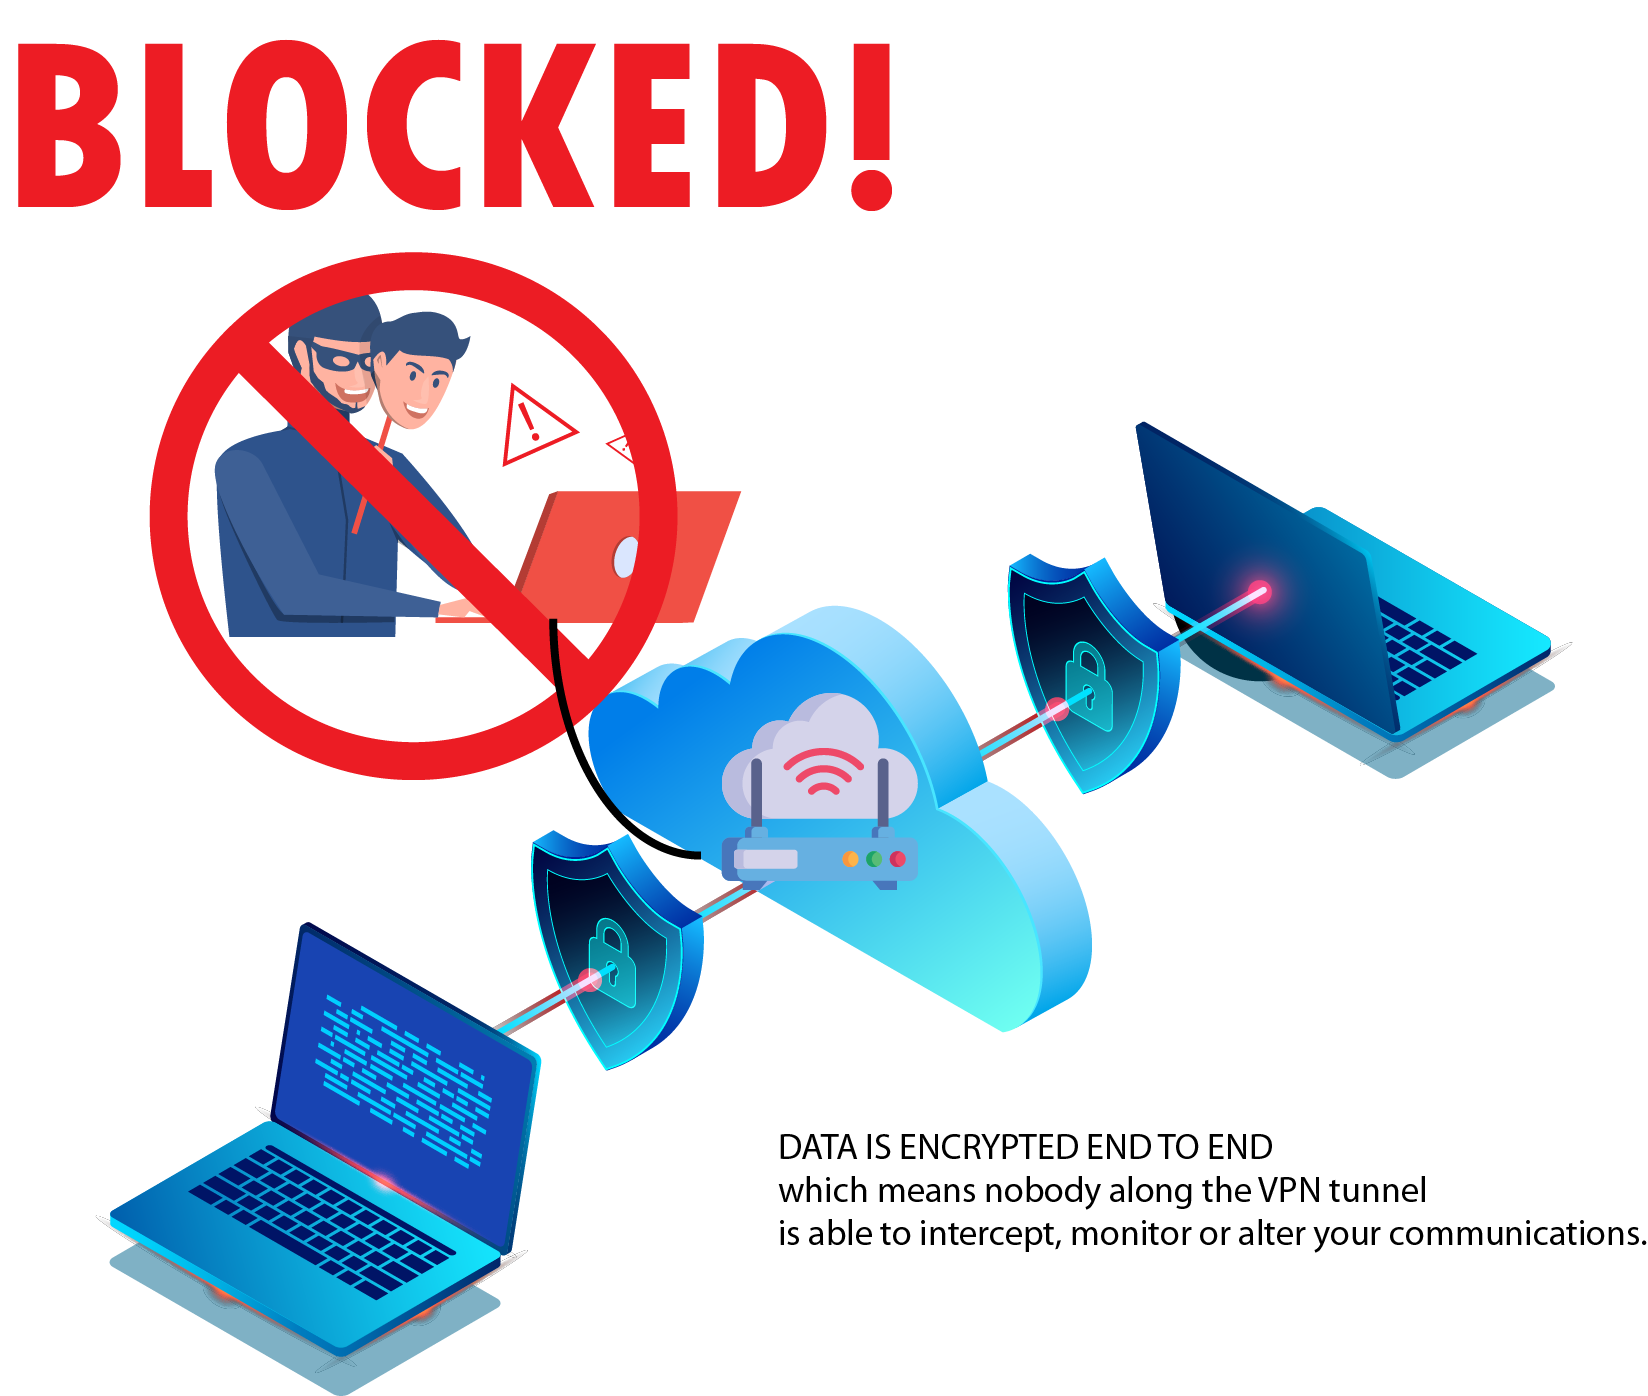
A VPN hides your IP address and encrypts your online activity by connecting you to an encrypted, private VPN server. Your data then passes through that VPN server and onto the internal network and/or the Internet. By doing this, you can establish a secure connection between your device and the internal devices on the internal network, such as a printer, gaming device, servers, etc. as well as provide a secure connection to the Internet. Certificates verify the authenticity of the VPN server you are connecting to. If someone attempts to imitate the server without the proper certificate, you will not be allowed to connect and also notified that the connection attempt failed because the server that was expected could not be properly verified. You should really be using a VPN anytime you connect to public Wi-Fi to ensure your data is safe, especially if you are doing sensitive things such as accessing email, banking or shopping on the Internet.

In this tutorial we are going to be setting up a MikroTik router to act as our OpenVPN server. Devices will then be allowed connect to the server and data will pass over our encrypted connection and onto our private network and/or the Internet. Anytime we connect to an insecure network and connect to our VPN, all that insecure network will be allowed to see is the encrypted traffic. Our actual data remains safely hidden in our encrypted tunnel.

?
If you are setting up a VPN server at home, you should check to see if your home network is assigned a static or dynamic public IP address assigned by your ISP. It is highly recommended to have your VPN server assigned to a static IP address, but if you are unable to do so, it is advisable to sign up with a Dynamic DNS Host Name Provider (DDNS) such as No-IP or DynDNS which is a service that maps your IP address to an Internet domain name and updates the service automatically if your ISP assigns you a different IP address. 
?
If you are setting up a VPN server at home, please be aware that you may be behind a device that is providing firewall and NAT services that may effectively interfere with proper operation of the VPN server. (Some services allow you to connect directly to their network with a router, others may require the use of a modem or modem/router combination). The recommended scheme is to have your ISP assigned device in bridged mode to allow the connection to pass through the ISP assigned device to your MikroTik router. How to set up your ISP assigned device in bridged mode is beyond the context of this article, but your ISP should be able to provide support on setting that up for you. Please be aware that setting your ISP assigned device in bridged mode, you may be eliminating protective NAT and firewall services set up by your ISP and potentially exposing your network to the Internet. It is essential that you have a working firewall in place to prevent unintended access to your devices and your internal network.
?
DISCLAIMER OF DAMAGES: This blog provides general information and discussion about networking and related subjects. In no event shall the company, its officers, directors, employees or agents or any other service provider who furnishes services to customer in connection with this agreement or the service be liable for any direct, incidental, indirect, special, punitive, exemplary or consequential damages, or for any other damages, including but not limited to loss of data, loss of revenue or profits, or damages arising out of or in connection with the use or inability to use your network, including the inability to be able to dial 911 or to access emergency service personnel arising from information obtained through this website or its linked materials. The limitations set forth herein apply to claims founded in breach of contract, breach of warranty, product liability, tort and any and all other theories of liability and apply whether or not the company was informed of the likelihood of any particular type of damages.

Step 1: Ensure that a connection can be made to your MikroTik router. We will be opening up a TCP port on the MikroTik router to allow the VPN connection to occur. Ensure that

  • the router is on a static IP or you have made use of a DDNS (dynamic DNS service) which will provide static DNS resolution.
  • the router is not behind a NAT and if behind a firewall or has a firewall enabled on the device, that you are able to either forward traffic through the firewall to your MikroTik device or set up a firewall rule to enable inbound connections to the MikroTik device.
  • We recommend the use of a publicly accessible DNS host name for your VPN server, but you can use the IP address if that is unavailable.

Step 2: We are going to log into the MikroTik router and generate three security certificates. The first certificate is a CA (certificate authority) cert, followed by a server certificate, and finally, we will generate a client cert to be used on a client device. If you have additional users, it is recommended to generate a client certificate for each user. Do not use the same certificate for every user. If the certificate is compromised for any reason, we would need to invalidate that certificate which would invalidate all clients using that cert. Log into the router, and from the left menu, click on System -> Certificates.

?
As a rule of thumb never provide your certificates to anyone outside your home/business or organization. Giving away your certificates is like giving away your house keys. 
Launching the MikroTik certificate manager.

Preparing the CA Certificate:

Click the + sign to add a new certificate to the server. Enter the following information as shown and click OK when completed:

  • Name: CA
  • Common Name: DNS domain name of your router
  • Key Size: 4096
  • Days Valid: 3650(10 years)
  • Key Usage: crl sign, key cert sign. (This is on the Key Usage Tab)
Setting up CA cert
Setting up CA cert (key usage tab)

Preparing the server certificate

Click the + sign to add a new certificate to the server. Enter the following information as shown and click OK when completed:

  • Name: SERVER
  • Common Name: Publicly accessible DNS host name (we called ours vpn)
  • Key Size: 4096
  • Days Valid: 3650(10 years)
  • Key Usage: digital signature, key enciphement, data encipherment, tls server. (This is on the Key Usage Tab)
Setting up server certificate.
Setting up server certificate (key usage tab)

Preparing a client certificate

Click the + sign to add a new certificate to the server. Enter the following information as shown and click OK when completed:

  • Name: (I usually like to provide email address or name here so I know who's certificate this belongs to)
  • Common Name: Email address of client
  • Key Size: 4096
  • Days Valid: 3650(10 years)
  • Key Usage: digital signature, key enciphement, data enciphement, tls server. (This is on the Key Usage Tab)
Preparing a client certificate
Preparing a client certificate (key usage tab)

Step 3: We need to sign our certificates. Signing our certificates tells the OpenVPN server that these are genuine and authentic and enables trust. We are going to sign all three certificates. We need to sign the CA certificate first, because we will need the CA cert to sign the server and client certificates. Right click on the CA cert and click Sign.

Signing the CA cert

When you attempt to sign the server and the CA cert, also right click on the certificates and click Sign, but for each of these certificates, select the CA cert that we just signed from the CA dropdown as shown below.

Signing the server certificate. Note that it makes use of the CA certificate we previously just created and signed.
Signing the client certificate. Note that it makes use of the CA certificate we previously just created and signed.

We also need to perform one additional step, which is to enable trust for our server certificate. To do so, double click the server certificate, scroll down to the bottom and enable the Trusted option as shown and click OK.

Assuming we did everything correctly, the CA certicate should have the flags KLAT, our server certificate KIT, and our client certificate KI (K is private certificate, L is CRL or certificate revocation list, A is authority, I is issued and T is trusted)

Step 4: We are going to export the CA and Client certificates. We are going to export the CA certificate without a passphrase and the client certificate with a passphrase. This is done by right clicking the certificate and click Export

Exporting the CA certificate

Export the client certificate, this time, we are going to add a password to the client cert.

Exporting the Client certificate

Step 5: Click Files on the left hand menu. You should find the files that we just exported there. Select the three files and drag these files to your computer desktop and save them. We are going to use them later when we set up the client.

Locating exported files. Save these to your computer for later use for our client. 

Step 6: To support clients connecting to our VPN server, I recommend setting up your VPN clients on a VLAN. This makes it easier to identify, control and set rules for client devices. (For example, having a separate pool means you can create a firewall rule to exclude incoming devices from being able to connect to certain internal resources and so forth). We are going to create a new VLAN, VLAN 60 with the following information
Name: vlan60
Bridge: ovpn-bridge
Gateway: 192.168.60.1
Network: 192.168.60.0
DHCP IP Range: 192.168.60.2 - 192.168.60.254

Step 7: The next step is to configure the OpenVPN Server. Create the server by going to the PPP menu on the left and then click the Profiles tab and click the + to create a new profile. Set the profile as shown:
Name: ovpn-profile
Local Address: The IP address of the bridge interface
Remote Address: Select the IP pool that we created above
Bridge: select the bridge that your VLAN is configured on.
DNS Server: enter the addresses of any DNS server(s) you wish your VPN to use here.

Creating a new PPP profile for our OpenVPN configuration

On the second tab of the PPP profile (Protocols), make sure that encryption is turned on as shown.

Step 8: Enable the OpenVPN server. On the PPP window that we currently have open, click the Interface tab, and then click OVPN Server. Configure the server as shown below.

Setting up OpenVPN Client Profile

Step 1: Now that our server is set up, we are going to begin the process of setting up our client profile. OpenVPN uses a username/password combination for authentication. To add a new user, go to the Secrets tab under the PPP menu and click the + to add a new user

Creating a new OpenVPN user account
Our new user setup in the PPP service
⚠️
NOTE: I have shown the following example below with the option to save the username/password in a file rather than enter the username/password every time I log in. This can be a security risk, as someone may be able to get ahold of your device and the secret file containing your username and password. If you wish to omit the file and enter the username/password when you login, change the line to simply auth-user-pass

Step 2: Create the .ovpn client profile. On your computer, create a file (I called mine mikrotik.ovpn) and enter the following in the file:

client
dev tun
proto tcp-client
remote <dns hostname of vpn server>
port 1194
nobind
persist-key
persist-tun
tls-client
remote-cert-tls server
ca CA.crt #CA certificate file
cert CLIENT.crt #CLIENT certificate file
key  CLIENT.key #CLIENT certificate key
verb 3
mute 10
cipher AES-256-CBC
data-ciphers AES-256-CBC
auth SHA1
auth-user-pass secret #File with user/password for VPN
auth-nocache
topology subnet
redirect-gateway def1 #remove semicolon for full redirect

Step 3: (Optional - see callout above). Create another file called secret. This file will hold our username/password combination (so that we don't have to enter the username/password every time we log in). Inside the username password file, enter the username we set up on the PPP secret page on the first line, and your password on the second line of the file and save the file.

<username>
<password>

Step 4: You should now have the following files: Your CA certificate, your client certificate and client key, your .ovpn configuration file, and optionally, your secret file containing your username and password. Provide these files to the client to establish a connection to the server.

Setting up OpenVPN Client (Android)

To use OpenVPN Connect you must have an OpenVPN profile that connects to a VPN server. OpenVPN profiles are files with the extension .ovpn.

To import a profile, do the following:

Copy the profile and any files it references to a folder or SD card on your device. Ensure you copy all files to the same folder. Launch OpenVPN Connect, tap the menu icon, tap Import Profile, and tap File. Select the .ovpn profile from the folder location. It may ask you for the certificate password (this is the password we added when we said to export certificate) .

Setting up OpenVPN Client (iOS)

To use OpenVPN Connect you must have an OpenVPN profile that connects to a VPN server. OpenVPN profiles are files with the extension .ovpn.

To import a profile, do the following:

Connect your iPhone to your PC and open iTunes. Click the Device icon and then click File Sharing. In the list of apps, scroll down and select OpenVPN and in the OpenVPN Documents pane drag and drop the profile and any files it references onto this pane. Launch OpenVPN Connect, and you should see the .ovpn profile you created referenced here. Import the profile. It may ask you for the certificate password (this is the password we added when we said to export certificate).

Setting up OpenVPN Client (PC)

Follow the instructions here using the files that we created earlier